8 Red Flags When Choosing a 3PL [Expert Analysis]
We asked 3 eCommerce professionals what warning signs brands should watch for when choosing fulfillment partners. We then took their answers and cross-checked them with what hundreds of eCommerce sellers have reported online. Together, we were able to find a consistent set of red flags that you should watch for if you’re shopping for a 3PL.
The sales process always goes well.
The pitch deck is polished, and the account rep is responsive. The pricing looks competitive. It feels like everything is a good fit.
Such is sales. That’s how it’s supposed to work. It’s supposed to make you feel confident, and this is as true for 3PLs as it is for any business.
But if that confidence isn’t warranted, you’ll find out the hard way. And that means your inventory could be sitting in their warehouse and your customers could be waiting for orders.
One eCommerce seller on r/ecommerce left behind this vivid horror story, with line breaks between every sentence:
“They almost killed my business. Claiming it has taken 24 hours to unpack 600 units with 3 SKUs. Billing me £40 for a medium sized parcel domestic UK. International shipping is incredibly high. I had stock in the USA and it’s still cheaper to send from the UK to USA. Support is terrible. Packing and sending orders out in someone else’s shipping carton that said ‘made in China.’ Sending orders out upside down. Incorrect billing here and there. So glad I’ve got myself out of there. Regained control of my business.”
That is a dense story because of just how many narrative threads there are. In their time, they dealt with billing surprises, communication breakdowns, issues with quality control, and—cherry on top of it all—a hard time switching vendors. Presumably, sales felt fine, though.
Milan P Sony, a product marketing manager and growth strategist, touched on this dynamic in our companion piece on how to choose a 3PL: “They don’t talk to existing clients, don’t run a proper pilot, don’t test returns, and don’t read the pricing fine print. Everyone sells well on calls. The problems only show up in operations, and by then it’s painful to switch.”
This is the article about what to watch for before that switch becomes painful.
We reached out to three industry professionals and asked them what red flags they look for during the 3PL evaluation process. We wanted to know specifically how they test technology and integration claims, as well as the questions that can reveal whether a 3PL can handle growth. And we wanted to know how they handle contract terms when it’s time for brass tacks.
Daniel Baker is the Head of Ecommerce and Marketplaces at Blue Vanilla Clothing Limited, evaluating 3PLs from the brand side. Matthew Beeson is the Senior Director of Platform Growth at nShift, working at the intersection of carriers, fulfillment technology, and eCommerce platforms. And June Le is at InterFulfillment, a Canadian 3PL, bringing the provider’s perspective on what separates serious partnerships from problematic ones.
We then cross-referenced their answers with insights from the experts we interviewed for our companion pieces on when to outsource fulfillment and how to choose a 3PL, plus voice-of-customer data from over a thousand Reddit posts and comments from real eCommerce sellers.
Then we sorted it all. What follows are eight red flags when choosing a fulfillment partner.
Red Flag 1: They Say Yes to Everything
This is Baker’s number one signal that something is off: “if they say yes to everything without either demonstrating how, or pausing to think through complicated questions.”
This sounds a little odd because you want the 3PL to have answers.
Yes, we can handle your SKU count. Yes, we can ship internationally. Yes, we can meet your SLA requirements. But supply chain management is extremely complicated no matter how good you are at it. So when a 3PL says yes to all of it without hesitation, it feels like a great sign, but that doesn’t mean it is.
Beeson puts this more starkly: “If you’re a new or early-stage brand, expect a good 3PL to push back on your growth projections and stock requirements. That’s actually a healthy sign. It might sting at first, but it means they’re being responsible. The real warning sign? A 3PL that eagerly onboards every startup that walks through the door without any due diligence. That kind of indiscriminate enthusiasm usually means they’re not in a strong position themselves.”
The 3PL that pushes back on your projections is showing you something valuable. They’ve done this enough to know what’s realistic and what isn’t, and they care enough about the operational relationship to be honest about it upfront.
Le frames the opposite scenario in operational terms: “If the provider speaks in outcomes but cannot clearly explain workflows, tailored solutions for your needs, labour planning, or peak season capacity allocation, there is a gap between sales narrative and operational reality.”
The pattern across all three experts is the same. A 3PL that can explain how they’ll deliver on their promises is one thing. A 3PL that just promises and can’t walk you through the operational specifics is telling you those specifics don’t exist yet, or won’t hold up under pressure.
Red Flag 2: The Pricing Doesn’t Add Up
Hidden costs and billing surprises are the single most common concrete complaint in the eCommerce fulfillment conversations we analyzed. The pattern is consistent: pricing looks reasonable during the sales process, then fees appear after onboarding that were never discussed.
One seller on r/FulfillmentByAmazon described discovering that their combined fulfillment-and-sourcing partner had been charging a 40% markup on products: “Factory direct price came back roughly 40% lower than what my fulfillment company has been charging me. 40%. When I asked about it they threw out some line about ‘quality assurance fees’ and ‘supply chain management costs’ they apparently never mentioned before.”
Another on r/shopify tallied the damage after switching. “We lost $10k+ in fees just by working with the last fulfillment center (before our current one). That includes: the difference in shipping costs to their warehouse compared to other possible companies, the expensive receiving fees and other hidden fees we didn’t realize until later, the cost of shipping the remaining inventory to our current [3PL].”
One seller on r/ecommerce found a 3PL offering a 50-cent flat-rate pick and pack — then realized “with an insert, shipping materials, and some other extras it would be closer to 1-1.5.” The headline rate was real. But the headline rate was also meaningless without the add-ons.
Baker’s test for pricing transparency is specific. “Ensure the rate card is transparent around pick, pack, returns, storage and ad hoc, so you know exactly what you will be paying, and when tendering make sure all 3pls present to you in the same way.” That last part is easy to miss but critical. If you’re evaluating multiple 3PLs and they’re each structuring their pricing differently, you can’t make an apples-to-apples comparison. And some of them are counting on that.
Le reinforces this from the provider’s side: make sure “rate cards are locked for a defined period and that volume based pricing tiers are clearly structured.”
Joseph Zigelboum, the founder of Brooklyn Botany who runs four beauty brands doing around $100M in collective revenue, put it plainly in our companion piece on how to choose a 3PL “I want simple, transparent pricing that I can actually model as the brand scales. Not teaser rates that fall apart once volume increases.”
The through-line is that if you can’t model the total cost at your current volume and at 2x scale, the pricing isn’t transparent enough. Ask for a complete fee schedule including receiving, storage tiers, pick and pack, returns processing, shipping markup or pass-through rates, and minimum commitments.
If any of those aren’t in the initial quote, it is completely fair game to ask why.
Red Flag 3: They Won’t Let You See the 3PL Operations
Baker keeps this one simple. A red flag is “if they are funny about a tour of warehouses.”
Le agrees: “Be cautious if a 3PL avoids warehouse visits or does not show real photos of their facility. A reliable partner should be open about their operations.”
If they’re proud of how they operate, they’ll show you. If they hesitate, deflect, or offer a virtual walkthrough instead of an in-person visit, that’s worth noting.
But Baker goes further than just the tour. He also recommends that brands “ask for a reference from a customer of theirs who uses the same tech stack as us, is on the same marketplaces.” A reference who uses the same platforms, sells through the same channels, and has similar operational complexity tells you whether the 3PL can handle your business, not just a business.
Sony warned in the companion piece that “everyone sells well on calls. The problems only show up in operations.” The site visit and reference check are the two best tools you have for getting past the sales layer and into the operational reality.
Sangita Dua, a Head of eCommerce who has held roles at Alexander McQueen, LVMH, and Mulberry, listed “site visit” as one of the most commonly skipped diligence steps in that same piece. She also recommended checking “what [the] 3PL don’t do well”—a question that most brands never think to ask, and that the best 3PLs will answer honestly.
See Also: How to Choose a 3PL for Your Ecommerce Business [Expert Analysis]
Red Flag 4: You’re Getting Different Answers from Different People
Le suggests looking for this problem early. “If sales, onboarding specialists, and operations provide different answers, this indicates internal alignment issues.”
This is one of the most reliable early indicators of deeper problems. If the sales rep promises next-day dispatch but the operations team hedges when you ask directly, that’s misalignment. And misalignment between sales and operations doesn’t get better after you sign. It gets worse.
There are a few ways to test for this during evaluation. Ask the same operational question to different people at the 3PL: your sales contact, the onboarding lead, and whoever will actually be managing your account day-to-day. Questions about turnaround times, error handling, and peak-season capacity are good candidates because they’re specific enough that the answers should match.
Beeson suggests a different but complementary test. “Follow the full customer journey of a brand they already work with.” Walk through their checkout experience, place a test order, check the tracking page, inspect the label when it arrives, and go through the returns process. This is a test of whether what they promise matches what they deliver for existing clients.
Baker’s approach of asking for a reference who uses the same tech stack and marketplaces serves the same function. When you talk to that reference, ask about the day-to-day communication: who they talk to, how quickly things get resolved, and whether the experience matched what was promised during the sales process.
Joseph Zigelboum framed this as a non-negotiable in the companion piece: “Can I text or email someone and get something done quickly? Stop a shipment, inspect a batch, fix an issue before it turns into a bigger problem.” That level of access doesn’t materialize after onboarding if it’s not part of the operating model. Ask during the evaluation who your day-to-day contact will be, what their authority is, and what the escalation path looks like. If the answer is a support ticket queue, that tells you something.
One seller on r/smallbusiness described an early warning sign that many brands ignore: “I was really interested in Nitro Logistics as I saw they can accommodate small orders—but I’ve submitted my enquiry form and email days ago—no response and it’s hard to get a point of contact.”
If you can’t reach them when you’re a prospective customer, when they’re trying to earn your business, you should probably walk. Because that’s the best the communication is going to get.
Red Flag 5: SLAs Are Vague & There’s No Process for Error Recovery
Le identifies two related red flags that test different things but point to the same problem.
The first: “If order accuracy, ship cut off times, and inventory accuracy are not explicitly defined, accountability will be weak post onboarding.” A 3PL that won’t commit to specific performance metrics during the sales process is telling you that they either don’t track those metrics or don’t want to be held to them. Neither is acceptable.
The second: “Weak answers around mispicks, inventory discrepancies, and carrier claims suggest immature operational controls and a lack of accountability.” This one is especially revealing. Every fulfillment operation makes mistakes. The question isn’t whether errors will happen. It’s whether the 3PL has a defined process for catching, correcting, and preventing them.
Baker adds another dimension: be wary “if they don’t share KPIs and their courier rate cards.” A 3PL that tracks and shares its own performance data is one that has confidence in its operation.
Beeson’s approach is to test the claim directly. Walk through the full customer journey of an existing client. Place a test order. Check whether the tracking page shows the 3PL’s branding or the store’s. Inspect the label. Then check the returns flow: “Is it a slick integrated portal or someone manually processing spreadsheets?”
The voice-of-customer data we collected shows what happens when SLAs aren’t defined upfront. One seller on r/ecommerce described their 3PL quietly adjusting inventory counts downward after a cycle count. When they pushed back, the 3PL’s defense was that “some level of shrinkage is considered normal, and the standard shrinkage rate across the fulfillment industry is between 2-5%.” The item in question measured 17″ x 14″ x 4″, was bright orange, and weighed 5.5 pounds. It didn’t misplace itself.
Another seller on r/ecommerce reported going through two different US-based 3PLs and losing 5% of stock each time while their UK and Australian partners had no similar problems.
Before you sign, ask for specifics: what’s their order accuracy rate, what’s their average ship time, what’s their inventory accuracy, and what happens when something goes wrong? If the answers are vague, you’re looking at a 3PL that either doesn’t measure its own performance or doesn’t want to share the results.
Red Flag 6: The Technology Doesn’t Hold Up to Scrutiny
Every 3PL in 2026 claims Shopify integration and real-time inventory sync. Fewer can deliver it in a way that works seamlessly at scale.
Beeson offers the most detailed technology evaluation framework of the three experts, and it starts with something most brands don’t think to do: follow the full customer journey from checkout to delivery to returns. “Can customers see different carriers for different markets?” he asks. “Place a test order and track it: does the tracking page show the 3PL’s branding or the store’s? Check the label when it arrives—does it say ‘3PL XYZ’?” These are small details that reveal how deeply integrated the 3PL’s technology is when it counts.
Le’s evaluation criteria are more structural. The 3PL should be able to explain clearly what system they use, whether it’s proprietary or third-party, and how updates are managed. She emphasizes that “strong partners offer real-time, API based integrations that sync orders, inventory, and tracking instantly. If the system relies on manual uploads or delayed syncing, it will create issues as volume grows.”
Baker suggests asking for a reference “from a customer of theirs who uses the same tech stack as us, [and] is on the same marketplaces.” If they can’t produce one, the integration they’re promising may not have been tested in your specific environment.
Le also raises a point that most early-stage brands don’t think about but should: security and compliance. “A 3PL’s WMS must be built with security at its core. Compliance with recognized frameworks such as SOC 2 Type II is a strong indicator of mature controls.”
Beeson also flags one technology gap that’s especially important for brands with international ambitions: carrier coverage. “If you’re planning to sell into the Nordics, Southern Europe, the US, Asia, or Australia, you’ll need serious carrier coverage. Getting this right early saves a lot of growing pains later.” This isn’t something you can evaluate from a feature list. You have to ask specifically which carrier services they offer in your target markets and then verify.
Red Flag 7: They Can’t Explain How They’ll Handle Your Growth
Ask any 3PL whether they can handle a spike in order volume and they’ll say yes. The red flag isn’t the answer, but rather whether they can explain the specifics of how.
Beeson identifies three structural factors that will cap your growth if they’re not in place: “carrier coverage, automation, and fulfillment locations.” He elaborates: “Carrier coverage means having the right partners to reach your target markets. Automation means the 3PL’s systems run without requiring manual input from your team. And fulfilment locations determine whether you can actually offer cost-effective next-day delivery where your customers are. Get these three right and almost everything else—including Black Friday surges—becomes manageable.”
Le offers a set of specific questions designed to stress-test capacity claims: “How do you handle a 2x or 3x spike in order volume within a short period? What is your current client mix by volume and complexity? How do you allocate warehouse resources during peak seasons?”
Baker’s approach is more concrete: look at “how big the warehouse is, how many warehouses they have, the size of the biggest brands they already have so we know where [we’ll] sit.” That last part matters. Knowing the size of their biggest existing clients tells you where you fall in their priority stack. If their largest client ships 50,000 orders a month and you ship 500, you’re not going to be the first call when capacity gets tight during peak season.
One seller on r/ecommerce described living through the capacity failure firsthand: “I’ve been in business for 6 years and am now on my 4th fulfillment company. Something that I have rarely seen discussed is: what if your fulfillment centre can’t fulfill? Like any business they must keep staff from turning over and operate at close to capacity to maintain profits, without going over capacity and deteriorating service. This is exactly what happened to me and I paid a steep price.”
Desiree Shank, an early Shopify hire who now works in social commerce, warned in our companion piece on when to outsource fulfillment about what happens when the capacity question goes unanswered until it’s too late: “The worst scenario is panic-migrating to a 3PL during Q4 or right after a viral spike. Onboarding while drowning is never ideal.”
The time to ask about peak season capacity, staffing plans, and turnaround time SLAs is before you’ve signed. Not in November when your orders triple and the warehouse goes quiet.
Red Flag 8: The Contract Is Designed to Lock You In
Baker’s contract guidance is specific and worth quoting in detail. “No more than [a] 12 month contract, potentially even a rolling one after 12 months. The ability to review rates every year. Flexibility on couriers used. Ensure the rate card is transparent around pick, pack, returns, storage and ad hoc, so you know exactly what you will be paying.”
Le focuses on exit terms. “Avoid restrictive locks in terms and ensure there is flexibility to transition out if needed. The agreement should clearly define inventory transfer processes, and also include direct escalation contacts across operations and leadership.”
She also recommends that brands “explicitly define storage, labour, and shipping capacity during high demand periods” in the contract itself—not just in a verbal agreement during the sales process. And she adds a detail that most brands don’t think to negotiate: “Clarify responsibility for fulfillment errors, inventory shrinkage, and carrier related losses.”
Beeson offers a realistic counterweight. “As a small brand, your negotiating leverage is limited—be realistic about that.” But he draws a useful distinction between where you can and can’t push. “Where you can push back, try to avoid committing to minimum order volumes.”
His broader point is worth considering. “The honest truth is that the best 3PLs won’t compromise their business model for an early-stage brand, and you probably don’t want them to. A 3PL that holds its standards is ultimately the one that will help you scale.”
A 3PL that bends all its terms to win your account is exhibiting the same “yes to everything” pattern from Red Flag 1. One that has standards and explains why they exist is showing you something about how they operate, which is something you should want to see.
The practical takeaway is to negotiate hardest on exit terms, rate review frequency, and shrinkage accountability. Accept that you may not get movement on every term. But make sure the contract reflects what was promised during the sales process, because if the verbal agreement doesn’t match the written one, that’s a red flag all by itself.
See Also: How To Choose An Ecommerce Fulfillment Partner
Final Thoughts
Eight red flags. Three experts. Over a thousand data points from sellers who’ve been through it. And the underlying pattern despite the wide range information we sourced is remarkably consistent.
The worst 3PL experiences almost always follow the same arc. A brand outgrows self-fulfillment. Then they select a 3PL under time pressure without doing enough diligence. There’s a honeymoon period where things seem fine, followed by compound problems like billing surprises, inventory discrepancies, and slow communication. Then when the exit finally happens, it hurts a lot.
The red flags in this article are here to help you avoid this cycle altogether. Every one of them is something you can test, ask about, or observe during the evaluation process. That way you can know what you’re getting into before you commit your inventory and your customers’ experience to a partner you can’t easily leave.
If you want a broader framework for evaluating fulfillment partners, we wrote a full guide on how to choose a 3PL for your ecommerce business. And if you’re still working through whether outsourcing is the right move at all, start with our piece on when to outsource fulfillment.
The decision isn’t just whether to outsource. It’s who to trust. Take the time to test the claims, visit the warehouse, talk to real clients, and read the contract. Your future customers won’t know your 3PL’s name. But they’ll know immediately if you chose the wrong one.
Few things are as exciting as shipping your first eCommerce order. Turning your ideas into a physical product and sending it out to customers all over the world feels incredible!
But there comes a point where self-fulfillment stops working. Your garage or spare room is overflowing with inventory, you’re spending hours a day packing and shipping, and mistakes start creeping in.
Wrong items, wrong addresses, chargebacks from shipping errors. As one eCommerce store owner put it on Reddit: “I’m at like 150 orders a week and I’m drowning. My garage is basically a warehouse now with inventory everywhere.” Another seller who switched from print-on-demand to private label described it this way: “The margins are better on paper but my time cost is insane if I’m being real about it.”
If that sounds familiar, you’re not alone. We recently identified 7 signs that an eCommerce business has outgrown in-house fulfillment, and most of them come down to exactly these kinds of growing pains.
That’s usually the moment people start searching for fulfillment pricing—and running into a wall. Every provider structures their pricing differently, the quotes are hard to compare, and it’s tough to know whether you’re getting a fair deal.
In this article, we’ll cut through that confusion. We’ll show you what fulfillment costs across the industry, explain how providers price their services, break down every fee category, and give you a free comparison spreadsheet so you can evaluate 3PL quotes side by side.
What Does Ecommerce Fulfillment Cost? [2026 Industry Benchmarks]
Before we get into the details, here’s what you can generally expect to pay across the industry. These ranges are based on publicly available rate data from multiple fulfillment providers as of 2026.
| Fee Type | Typical Range | Notes |
|---|---|---|
| Setup / onboarding | $0–$500+ | Some 3PLs waive this; complex integrations cost more |
| Account / platform fee | $0–$250/month | Varies widely; some bundle into pick & pack |
| Storage (per pallet) | $15–$45/month | Depends on location; climate-controlled costs more |
| Storage (per cubic foot) | $0.45–$0.75/month | Alternative to pallet pricing for smaller inventory |
| Storage (per bin) | $1–$3/month | For small items stored in bins |
| Receiving / inbound | $25–$45/pallet | Or $20–$50/hour; varies by complexity |
| Pick & pack (first item) | $2.50–$5.00/order | Industry average around $2.95 per single-item order |
| Pick & pack (additional items) | $0.25–$1.50/item | Decreases with volume at most providers |
| Domestic postage (avg) | $4–$8/order | Varies by weight, dimensions, zone, and carrier |
| International postage (avg) | $12–$25/order | Significantly higher; depends on destination |
| Supplies / packaging | $0–$1.00/order | Basic supplies often included; branded packaging extra |
| Returns processing | $2–$5/return | Inspect, restock or dispose |
| Kitting / assembly | Project-based | Priced per project due to manual labor involved |
| Total cost per order (domestic) | **$3–$15** | Depends on product size, weight, and complexity |
These are industry-wide ranges, not any single provider’s rates. Your actual costs will depend on your product, order volume, and which fulfillment center you work with.
Two important caveats.
First, most brands underestimate their fulfillment costs by 20–40%. James Coccaro, an operations and eCommerce leader who specializes in scaling DTC brands from early-stage to $50M+, puts it plainly in our expert analysis on outsourcing fulfillment: “Most brands underestimate in-house cost by 20–40%.”
Jaime Hill, an eCommerce director with over two decades of experience across brands like Monsoon and Oak Furnitureland, independently arrived at the same figure: “Most growing DTC brands discover that their true cost for in-house fulfilment is between 20–40% higher than they first thought.”
Second, the cheapest option isn’t always the best. Joseph Zigelboum, founder of Brooklyn Botany and operator of four beauty brands doing around $100M in collective revenue, says in our guide to choosing a 3PL: “I want simple, transparent pricing that I can actually model as the brand scales. Not teaser rates that fall apart once volume increases.”
How Fulfillment Centers Price Their Services
No two fulfillment centers have identical pricing. In fact, it’s really hard to make an apples-to-apples comparison.
There is no one-size-fits-all estimate. Even online fulfillment center price calculators can only give ballpark figures. To understand how order fulfillment costs will look for your business, you have to request personalized quotes from each fulfillment center you are thinking about working with.
Each quote will be structured differently. So you’ll need to compare costs in a spreadsheet in order to understand who is actually offering the best deal. (We’ve created a free comparison spreadsheet you can download further down in this article.)
Chris Parsons, Founder of Retail Rewired and a RETHINK Retail Top Retail Expert, describes the moment when the math starts to shift in our companion piece on choosing a 3PL. “When a brand calculates what it truly costs them to pick, pack, ship, store inventory, and manage fulfillment internally, there is usually a point where that cost starts getting close to the minimum monthly commitment of a 3PL. At that stage the decision often comes down to a simple question: do we hire another person and continue building internal operations, or do we move to a partner that already has the infrastructure, negotiated carrier rates, and systems in place?”
But even with all the variables and differences between fulfillment centers, they all follow similar logic. Once you understand the logic, then you can understand the quotes.
Basic Formula for Calculating Order Fulfillment Costs
Order fulfillment pricing can be understood with this formula:
Fulfillment Cost = Account & Storage Fees + ((Postage + Supplies + Pick and Pack Fee) × Packages Shipped) + Value-Added Services
Yes, that’s still pretty complex. Let’s break it down. But first, if you’d like to see this formula in action, watch our short video on calculating fulfillment shipping costs. It’s technically for crowdfunding, but is still very applicable to eCommerce.
Breaking Down the Costs
Understanding the individual parts of fulfillment costs will help you make better choices. Here’s each component of the formula explained.
Account & Storage Fees
Account and storage fees are ongoing costs for keeping your inventory at a fulfillment center. Think of it like rent for your products’ storage space. These fees are usually billed monthly and will change based on how much inventory you have, the amount of storage you need, and the fulfillment center’s policies.
Account fees depend on the fulfillment center. Some charge a minimum amount per month for account maintenance, which might be waived if your order volume is high enough.
Storage costs are often based on cubic footage or the number of pallets stored. Bigger, bulky items cost more than smaller ones. Some fulfillment centers also charge extra for climate-controlled or special handling storage. Across the industry, expect to pay roughly $15–$45 per pallet per month or $0.45–$0.75 per cubic foot per month.
Pick & Pack Fees
Pick and pack fees cover the cost of workers getting each item from your inventory, packing them for shipment, and printing and attaching postage labels. This fee is applied to each order that gets processed.
A typical pick-and-pack fee structure looks like this:
- First item: $2.50–$5.00
- Each additional item: +$0.25–$1.50
High-volume businesses can often negotiate a lower rate. The industry average for a single-item order is roughly $2.95, though this varies based on product size, weight, and handling complexity.
Postage
Postage costs vary widely based on the size and weight of your items, where they are being shipped, and the speed of shipping. Fulfillment centers often get lower rates with major carriers like USPS, UPS, and FedEx because of their bulk shipping volume, often 10–30% below standard rates.
The location of your fulfillment center also affects postage rates. Shipping from the US east coast to a customer in New Jersey costs far less than shipping that same package to California. For this reason, some brands work with 3PLs that have multiple warehouse locations to reduce average shipping distance.
For domestic orders, expect average postage of $4–$8 per order. For international, $12–$25 depending on destination and package weight.
Supplies
Basic packaging supplies—boxes, poly mailers, tape, and dunnage—are usually included in the pick-and-pack fee at most fulfillment centers. However, specific packaging needs like branded boxes, tissue paper, or environmentally-friendly materials might cost extra. Ask for detailed information if you need specialized packaging.
Value-Added Services
Fulfillment centers offer more than just storage and shipping. They can do custom packaging, kitting, product inspections, and return processing. Prices for these services vary a lot, depending on what you need. Still, it’s important to be proactive and gather this information so there are no surprises on your invoice.
How To Compare 3PL Quotes: Free Spreadsheet
To figure out the total cost of order fulfillment, gather quotes from at least two or three fulfillment centers and compare them side by side. The problem is that every 3PL structures their pricing differently, which makes direct comparison difficult. As one store owner searching for a 3PL put it: “Everywhere I look I feel I just see mixed reviews.” And the frustration isn’t always about the sticker price—it’s about the surprises. One seller discovered their fulfillment partner had been marking up product costs by 40% under vague line items like “quality assurance fees” that were never disclosed upfront.
Daniel Baker, Head of Ecommerce and Marketplaces at Blue Vanilla Clothing, recommends a specific approach from our guide to 3PL red flags. “Ensure the rate card is transparent around pick, pack, returns, storage and ad hoc, so you know exactly what you will be paying, and when tendering make sure all 3PLs present to you in the same way.”
To help you do exactly that, we’ve built a free comparison spreadsheet you can download and use.
[Download: Fulfillment Cost Comparison Spreadsheet (.xlsx)]
The spreadsheet includes:
- Your assumptions — monthly order volume, average items per order, pallets stored, and domestic/international split
- Fixed monthly costs — account fees, storage, technology fees, and monthly minimums
- Per-order variable costs — pick & pack, postage (weighted by your domestic/international mix), and supplies
- Value-added services — kitting, returns, receiving, and other services
- Calculated totals — estimated monthly cost, cost per order, and annual cost for each 3PL
All formulas are built in. Replace the blue input cells with figures from your actual quotes and the spreadsheet does the math.
Tips for using the spreadsheet
Start by entering your estimated monthly order volume, since this drives the entire calculation. For Account & Storage fees, plug in your best estimate from the quotes. Do the same for Value-Added Services like special packaging, custom labeling, or return processing.
Postage is more complex because it varies by destination, so the spreadsheet uses your domestic/international split to calculate a weighted average.
Once your numbers are in, you can see the total estimated cost for each fulfillment center side by side. Pay close attention to any significant differences in fees, especially for services that are crucial to your business.
Remember: the goal is not to pick the cheapest option. The goal is to pick a company with competitive prices and good service. As Zigelboum puts it, what you want is “simple, transparent pricing that I can actually model as the brand scales.”
Hidden Costs to Watch Out For
Even after you compare fulfillment center quotes, unexpected costs can creep up. Many eCommerce businesses don’t realize these fees exist until they show up on their invoice.
If you know about common hidden costs, you can ask the right questions upfront. Always request a detailed breakdown of fees before choosing a fulfillment partner.
1. Long-Term Storage Fees
If your products sit in a fulfillment center for too long, you may get hit with extra storage charges. Many providers charge higher rates for inventory that remains unsold beyond 30 to 90 days. Ask about long-term storage policies before signing up.
2. Peak Season Surcharges
During busy shopping seasons like Q4, fulfillment centers often increase their rates. These peak season surcharges can apply to pick-and-pack fees, storage, and even shipping costs. If your business relies on holiday sales, factor in these extra costs.
3. Special Handling Fees
Does your product require fragile handling, climate-controlled storage, or unique packaging? Many fulfillment centers charge extra for these services. If you sell breakable or perishable goods, make sure you understand the full cost before you commit.
4. Return Processing Fees
Handling returns is rarely free. Some fulfillment centers charge $2–$5 per returned package, while others charge a flat monthly fee for reverse logistics. If your return rate is high, these fees can add up quickly.
5. Labeling and Barcoding Costs
Some fulfillment centers require barcodes on all inventory, and if your products don’t arrive pre-labeled, they may charge a labeling fee. Check if your provider includes barcode labeling in their pick-and-pack fees.
6. Kitting and Assembly Fees
If your orders require bundling multiple items or special packaging before shipping, fulfillment centers may charge a kitting or assembly fee. This is common for subscription boxes or multi-piece product sets.
How U.S. Tariffs Affect Ecommerce Fulfillment Costs
If you manufacture outside the United States, you need to account for tariff costs on top of your fulfillment expenses.
The elimination of the U.S. de minimis threshold for certain countries means that virtually all international shipments now require proper documentation, and most will come along with tariff fees. Products that previously entered the US under the $800 exemption may now face substantial duties depending on country of origin and product classification.
Two tools can help you estimate the impact:
- Freightos — for estimating what it will cost to ship your items from your manufacturer to your fulfillment center
- SimplyDuty — for calculating customs, duties, and tariffs based on your product type and origin
With these tools, you can estimate your import costs. Then, once your items are in the warehouse, use the fulfillment cost formula and benchmarks above to forecast the rest.
For a deeper dive, see our tariff guide for eCommerce and Kickstarter brands.
How To Calculate Your True In-House Fulfillment Cost
If you’re currently fulfilling orders yourself and trying to figure out whether outsourcing makes financial sense, you need to know what you’re spending right now.
Coccaro breaks in-house costs into five buckets in our expert analysis on outsourcing fulfillment:
- Fully burdened labor — wages, payroll tax, management time
- Facility costs — rent, utilities, insurance, equipment depreciation
- Packaging and waste — materials, damage replacement
- Software — WMS, shipping tools, inventory systems
- Opportunity cost — what leadership could be doing instead of packing boxes
Add those up and divide by your monthly order volume. That’s your true cost per order. Then compare it to the 3PL quotes using the spreadsheet above.
When does a 3PL start making financial sense?
As a general benchmark, most 3PLs become cost-competitive somewhere around 100–300 orders per month, though the exact breakpoint depends on your product size, margins, and how much you value your own time. Below that range, the monthly minimums many 3PLs charge may not make financial sense yet.
This is one of the most common questions eCommerce owners wrestle with. One seller doing 300 orders per month in accessories and apparel described the tension: “I currently rent out a small space for $775 a month, but I definitely want to go bigger next year.” A commenter in the same thread shared their actual 3PL costs: roughly $14.45 per order plus $500/month in storage and $500/month in software fees — more expensive than self-fulfillment, but it freed up time to grow the business.
The math isn’t just about the per-order cost. It’s about what you could be doing with the hours you’re currently spending on packing and shipping. A seven-figure apparel brand that outgrew their 3PL and considered going back in-house found that the operational complexity of managing warehouse staff, inventory, and peak-season surges was itself a full-time job. We cover more of these warning signs in our post on 7 signs your eCommerce business has outgrown in-house fulfillment.
Hill offers a useful reframe saying that you can ask “whether fulfilment needs to be a core competency of your brand or not, rather than is a 3PL solution cheaper.”
For a full expert-sourced breakdown of this decision—including how to evaluate whether a 3PL is the right fit—see our guides on when to outsource fulfillment and how to choose a 3PL.
Final Thoughts
Estimating order fulfillment costs for your eCommerce business can be tricky. But understanding how fulfillment centers set prices, knowing the industry benchmarks, and using a structured comparison process can help you make a smart decision.
Start with the pricing benchmarks in this article to calibrate your expectations. Then request personalized quotes from fulfillment centers you’re considering, plug them into the comparison spreadsheet, and evaluate on total cost. Not just the cheapest line item.
Customers expect smooth, hassle-free delivery. Provide it, and you set yourself up for long-term success.
Ready to see what fulfillment would cost for your business?
We’ve helped thousands of eCommerce and crowdfunding brands ship order, from startups doing 100 orders a month to established brands doing 10,000+. Tell us a little about your business and we’ll put together a custom quote so you can plug real numbers into the spreadsheet above.
Frequently Asked Questions
What are fulfillment costs in eCommerce?
Fulfillment costs in eCommerce include all expenses related to storing, packing, and shipping products to customers. This usually covers account and storage fees, pick and pack fees, postage, supplies, and any extra services the fulfillment center offers.
How do you calculate fulfillment costs?
To calculate fulfillment costs, use the formula: Fulfillment Cost = Account & Storage Fees + ((Postage + Supplies + Pick and Pack Fee) × Packages Shipped) + Value-Added Services. Get quotes from fulfillment centers and use a spreadsheet to compare costs side by side.
What is a fulfillment fee?
A fulfillment fee is the charge incurred for processing an order. This includes picking items from storage, packing them securely, and attaching shipping labels. Fulfillment fees vary depending on the number of items per order and the complexity of the packaging required.
How much does a 3PL cost per order?
Across the industry, total fulfillment cost per domestic order typically ranges from $3 to $15, depending on product size, weight, and complexity. This includes pick and pack, postage, and supplies — but not storage or account fees, which are billed separately on a monthly basis.
What is the average pick and pack fee?
The industry average for a single-item pick-and-pack fee is approximately $2.95 per order. Additional items typically add $0.25–$1.50 each. These rates vary by provider and can often be negotiated at higher volumes.
How many orders per month do I need for a 3PL to make sense?
Most 3PLs become cost-competitive at around 100–300 orders per month, depending on your product and margins. Below that range, monthly minimums and account fees may outweigh the time savings. The real question isn’t just cost — it’s whether fulfillment needs to be a core competency of your brand, or whether your time is better spent on growth.
Launching a successful Kickstarter campaign requires a ton of different skills.
Strategic planning. Marketing and promotion. Supply chain management. People skills. The list goes on!
In this guide, we’ve compiled a list of every single tip we can think of to help you increase your odds of Kickstarter success.
We’ll cover everything from setting realistic funding goals, to building a strong social media presence, to creating compelling campaign pages, and much more.
Pre-Launch Preparation
Most of your Kickstarter success is baked in long before you hit the launch button. It’s because of this that you need to focus on research, setting realistic goals, and building up an initial support base.
Below, you will find some specific tips on how you can do that.
#1: Choose the right platform (it might not be Kickstarter!)
Kickstarter is the biggest crowdfunding platform. But it’s not the only one.
Kickstarter is ideal for film, music, and games. So it’s great for those needing all-or-nothing funding to avoid insufficient capital.
Indiegogo performs well in the tech, fitness, and home products niches, plus it offers flexible funding. That is, you don’t have to reach 100% of your goal in order to raise capital.
Then there’s Gamefound, which is a growing alternative to Kickstarter for board game creators.
Make sure you choose the platform that best fits your project’s needs. That might very well be Kickstarter – but don’t just pick it because it’s the first name that comes to mind!
#2: Set a realistic funding goal
Set a goal too low and you won’t be able to fulfill your promises. Set a goal too high and you lower your chances of funding.
Calculate the minimum amount needed to create your product, considering all costs, including production, shipping, and marketing. Setting a realistic goal helps you attract more backers and also helps you deliver on your promises.
Once you figure out the minimum amount you need – don’t go too far beyond that. Stay in the Goldilocks zone.
For context, the team behind Botany, a nature-themed card game, set a modest funding goal and funded in just 15 minutes. That early funding signal boosted their visibility on Kickstarter’s algorithm, which drove more organic traffic for the rest of the campaign. They didn’t set the goal artificially low. They simply set it at a level that reflected real production costs while still being achievable with their existing audience.
#3: Research campaigns – both successful and unsuccessful
You need to understand what makes other campaigns successful. Go to Kickstarter and look at campaigns. Find successful and unsuccessful ones and learn as much as you can about why they have or haven’t succeeded.
There’s no reason to create plans completely from scratch. There’s also no reason to duplicate others’ mistakes!
Pay extra close attention to the campaigns that line up most with your niche.
#4: Line up your earliest backers
Build initial support by reaching out to friends, family, and contacts before launching. Early backers can help create momentum, attracting more support as a result.
Personal connections are often the first to pledge, so their support can be critical in the initial stages of your campaign.
Few people want to be Backer #1. But if Mom wants to put $100 in, you don’t have to deal with that problem.
#5: Create a pre-launch landing page
Collecting email addresses is one of the best ways to stay in touch with potential backers so you can start marketing early. Gathering emails means that you can tell a huge group of people when the campaign is live.
One way you can convince people to provide their email is to build a landing page. On the page, you can tease your project and encourage visitors to sign up for updates.
This is one of the most effective ways to build stream for projects before they launch.
#6: Build a strong social media presence
Social media helps you connect with potential backers, creating a community around your project before you launch. Share behind-the-scenes content, updates, and teasers to build excitement.
Think about the platforms where you are going to be most likely to find potential backers. Prioritize using platforms first instead of spreading yourself thin over too much channels.
#7: Set up email marketing
We touched on this in #5, but it’s so important that it bears repeating. Build an email list so you can notify potential backers about your launch and provide updates.
Regularly communicate with your subscribers, providing exclusive insights and early access to your campaign. This is traditional wisdom because, when combined with other smart marketing tactics, it can be very effective!
#8: Prepare press releases for media outreach
Get your project featured in relevant media and blogs. Draft compelling press releases and pitch them to bloggers, journalists, and influencers in your industry. Early media coverage can help build credibility and then attract more backers to your campaign, increasing your chances of success.
#9: Engage with the Kickstarter community
Join forums and groups to network and gather support. Participate in discussions, share your project updates, and seek feedback from experienced creators. When in doubt, look for Facebook groups, LinkedIn groups, and certain subreddits.
#10: Plan your logistics
Before you announce a launch date, make sure you have a plan for production, shipping, and fulfillment to avoid delays. This is one of the most underrated parts of Kickstarter preparation, and it’s where a lot of campaigns get into trouble after they fund.
At a minimum, you should:
- Get freight quotes early. Contact freight forwarders or use tools like Freightos to estimate what it will cost to move your finished product from the factory to a warehouse. Sea freight is cheaper but slower; air freight is faster but dramatically more expensive.
- Talk to fulfillment companies before you launch. Request quotes from at least two or three 3PLs so you understand what pick-and-pack, storage, and postage will cost. This directly affects your reward pricing. You can learn more about this in our fulfillment pricing guide.
- Build a shipping budget. Your Kickstarter budget should account for manufacturing, freight, customs, fulfillment fees, and postage. Not just production. Many first-time creators underestimate shipping by 30-50%, which can wipe out their margins.
- Plan for international shipping. If you expect international backers, you need to decide how you’ll handle customs and VAT before you launch.
- Order more stock than you think you need. At a minimum, order 20% more units than your backer count to account for defects, lost shipments, and post-campaign sales.
Don’t wait until after you fund to figure this out. By then, your margins are locked in.
Campaign Page Setup
Your campaign page needs to give people great reasons to back your project. That means have high-quality visuals, clear copywriting, and all the information backers need to feel like they can trust you.
Here are some tips on how you can make a campaign page for the ages.
#11: Create a captivating campaign video
Your campaign video is going to be one of the first things that people notice when they see your campaign. Make sure you use high-quality visuals and audio. Your video needs to have a strong narrative as well as a clear call to action.
You want to introduce your product, show people why they should back it, and tell them what to do next. It’s an easy way to increase the number of pledges you see. The vast majority of successful campaigns, after all, have videos!
“The most effective crowdfunding campaigns are typically built on storytelling, building a community, and transparency,” says Dan Korte of Riseabove Apparel. “The elements of good story-telling, the ongoing connection with potential customers, and the transparency of information carry much more value than the product, or even ideas, itself.”
Calamityware is a great example of this principle in action. Over the course of 70+ Kickstarter campaigns, creator Don Moyer built a loyal community that kept coming back—in large part because his campaign pages and updates consistently told a clear, authentic story about the products. When your storytelling is strong and your delivery is reliable, backers become repeat customers.
#12: Design a visually appealing campaign page
Your campaign page needs to look beautiful. That means using lots of high-images and breaking up the sections of your page with easy-to-read headers for maximum skimmability.
Every bit of text you use needs to serve some function. You need to provide a lot of information, but not at the expense of good looks. Appealing pages lead to increased pledges!
When in doubt, look at what the most financially successful campaigns in your niche are doing.
#13: Write an excellent campaign page
Clearly explain your project, its benefits, and how backers’ funds will be used. People need to know exactly what they’re buying, why it’s great, and what makes it different from all the other products.
Every line of text you use needs to help potential backers understand your vision and the value of their support. Use straightforward language, because that’s the best way to keep your copy clear and avoid confusion.
#14: Make your unique selling proposition (USP) immediate and clear
Use an eye-catching headline and concise summary to grab attention. Clearly state what makes your project unique and why backers should support it. A strong USP can differentiate your campaign from others.
This is extremely important because Kickstarter is a noisy marketplace, and unless your USP is super clear, you’ll blend into the crowd.
#15: Add a detailed FAQ section
Address common questions and concerns to build trust. Cover topics like reward fulfillment, project timeline, and risks involved.
Pro tip: write your FAQ in advance so you can copy and paste it into your campaign page right after you go live.
#16: Take and use great product photos
Use images that show your product in use and resonate with your audience. High-quality photos can make your product more relatable and appealing, helping potential backers envision it in their own lives. Visual storytelling is a powerful tool to enhance your campaign.
Even if you’re on a shoestring budget – buy a few lamps and get some bright LED bulbs. This will dramatically improve your picture quality, even on an older model iPhone.
#17: Provide detailed product specifications
If your product is technical, make sure you provide all the information you can. The more specific you can be, the better.
When in doubt, make sure customers know how big the product is, how much it weighs, and what materials go into making it. This will help backers feel like they are making an informed purchase as a result.
#18: Share your journey and story
Personalize your campaign by sharing your background and the creation process. Let backers know who you are, why you created this project, and the challenges you’ve faced. This connection builds trust and makes your campaign more relatable and engaging.
People buy products. But they back creators.
Marketing and Promotion
If you launch your Kickstarter, but don’t tell anyone about it, you probably won’t fund. You need to have a killer marketing and promotion plan if you want to succeed on Kickstarter.
Because marketing is so important to success, we’ve compiled a list of marketing tactics that might work for you.
#19: Use Facebook and Instagram ads
Meta, which includes Facebook and Instagram, remains one of the best advertising systems in the world. It’s also one of the most approachable.
With Facebook and Instagram ads, you can target your audience and make sales while your campaign is live. Facebook’s robust targeting options allow you to reach specific demographics, increasing the likelihood of attracting backers who are interested in your project.
#20: Collaborate with influencers
Partner with relevant influencers to promote your campaign. Because the right influencers can reach a large audience and lend credibility to your project.
Choose influencers who align with your project’s niche and values. That way, you can be sure their followers are likely to be interested in your campaign, enhancing its visibility and appeal.
Influencers don’t necessarily have to be social media stars, mind you. They can also be TV and radio professionals, reviews with well-read blogs, or even local community organizers. The point is that you want to find people who know people.
#21: Use multiple marketing channels
Don’t rely on one marketing channel for success. Use social media, email marketing, and online ads to reach your target audience in as many places as possible.
Every marketing platform has unique benefits that can enhance your campaign’s visibility. A multi-channel approach will help you make sure you catch potential backers wherever they are online.
#22: Run pre-launch ads
You can use Facebook, Instagram, Google, and other ad platforms before you launch your campaign. As long as you have a landing page and a way to collect emails, it’s actually best practice to generate as many leads as you can before launching. That way, you can dramatically increase the odds of day 1 success.
#23: Engage in online communities
This is similar to the advice on engaging with the Kickstarter community.
Join forums and groups to network and gather support. Participate in discussions, share your project updates, and also seek feedback from experienced creators. When in doubt, look for Facebook groups, LinkedIn groups, and certain subreddits.
Reward Strategy
Your campaign is only as good as your rewards. That’s because rewards are what get people to take action in the first place!
With that in mind, here’s how you make sure your rewards are doing their fair share of the heavy lifting.
#24: Offer great rewards
This is a simple tip, but it’s so important. Make sure backers like your rewards before you launch your campaign. If you don’t get an enthusiastic response to your rewards, then you should probably delay your launch date until you do.
#25: Set strategic reward tiers
On Kickstarter, the structure of your reward tiers can make or break your campaign. Create tiers that not only offer tangible value but also enhance the Kickstarter experience.
Start with a low-entry “Thank You” tier that allows backers to show support without a significant financial commitment.
Then your mid-level tiers should offer the core product plus unique add-ons that aren’t available post-campaign.
For high-level tiers, consider offering limited edition items or experiences that tap into the exclusivity that Kickstarter backers often seek, like signed prototypes or an invitation to an exclusive launch event.
#26: Include early bird specials
Create a sense of urgency with limited-time offers. Early bird specials incentivize backers to pledge early, helping build momentum for your campaign. This can help push you over the funding goal early on in the campaign.
David Silva of Creative Beast used early bird pricing effectively across multiple campaigns, helping him double his Kickstarter revenue over time. The key is to make the discount meaningful enough to drive urgency, but not so deep that it undercuts your margins. A 10-15% discount off the eventual retail price is a common sweet spot.
#27: Provide exclusive rewards
Supply chain disruptions, carrier rate changes, and tariff policy shifts can all affect your campaign after it funds. The 2025-2026 tariff environment has made this especially important. Products manufactured overseas may face duties that didn’t exist when you launched.
Here are a few ways to stay flexible:
- Build a cost buffer into your budget. A 10-15% contingency for shipping and fulfillment costs gives you room to absorb surprises without going into the red.
- Don’t lock into a single carrier. Your fulfillment partner should be able to shop rates across USPS, UPS, and FedEx depending on package size and destination.
- Have a backup plan for manufacturing delays. If your manufacturer misses a deadline, you need to know how that affects your freight booking, your fulfillment timeline, and your backer communication. Map out the domino effect in advance.
- Communicate proactively with backers. If something changes—and it probably will—tell backers early and honestly. A transparent update about a two-week delay earns far more goodwill than radio silence followed by a three-month delay.
#28: Use bulk packages
Encourage larger pledges with discounted multi-unit rewards. Bulk packages provide better value and can increase the average pledge amount. As an added bonus, offering bulk options helps reach your funding goal faster by encouraging bigger pledges.
#29: Offer behind-the-scenes content
Engage backers with exclusive insights and updates. Share behind-the-scenes content that showcases your project’s development, challenges, and successes. Part of the appeal of Kickstarter and similar platforms is the chance to feel like you’re “in on something” early in its development – so take advantage of this!
Already at 500+ backers and wondering how you’ll ship it all?
That’s the scale where DIY fulfillment breaks. We’ve shipped 2,000+ Kickstarter campaigns, including over 70 for Calamityware alone.
Reach out today and you can get a clear quote on what it will cost to ship your campaign.
Campaign Management
You can’t just launch your campaign at 9 in the evening. Nor can you launch it, forget about it, and check back in 30 days later. You need to be hands-on about how you manage your Kickstarter campaign.
Here are some tips on how you can do that effectively.
#30: Launch at the right time
Time your launch for maximum impact. Pick the right launch month, day of the week, and time of day. It needs to line up with your audience’s availability and interest.
When in doubt, Tuesday or Wednesday is a good day to launch. Choose a reasonable launch hour like 9, 10, or 11 in the morning eastern time. Don’t launch between mid-November and mid-January. And lastly, avoid major holidays.
#31: Engage with backers
Respond promptly to comments and messages to build a strong community. Answer questions, acknowledge feedback, and keep the conversations going. Remember: this is part of what makes Kickstarter appealing. Backers have a direct line to the people making the things they want!
#32: Provide regular updates
Keep backers informed about progress, challenges, and successes. Regular updates build trust and maintain interest. Share milestones, production updates, and any hurdles you’re overcoming.
In general, you should be sending a Kickstarter update at least once per week during the campaign. Then after the campaign, it’s a good idea to send an update at least once per month. More is often advisable, depending on your situation.
#33: Thank your backers
Show appreciation and acknowledge support throughout the campaign. Regularly thank your backers through updates, comments, and personal messages.
This advice may seem basic. But when gratitude is absent, it’s noticeable, not to mention off-putting.
#34: Address challenges transparently
Be honest about any issues and how you plan to resolve them. In fact, backers expect Kickstarter campaigns to be a little chaotic.
It’s for that reason that being open about unexpected challenges and even mistakes can go a long way toward keeping trust.
#35: Monitor and adjust your strategy
Stay flexible and make necessary changes to your campaign based on feedback and performance. Part of what makes Kickstarter such a good launch platform is that backers will be vocal about what they like and don’t like. That makes it easier to know when to pivot.
#36: Stay flexible with sourcing and fulfillment.
Recent U.S. tariff changes have made supply chains more volatile. As Mark Ainsworth, Digital PR and Marketing Director at Max Web Solutions, put it, “several of our clients who trade in the U.S. have been hit with higher landed costs due to the new tariffs.”
It’s smart to start thinking about sourcing flexibility, pricing cushions, and fulfillment partnerships early in the process — not after you fund.
Post-Campaign
Launching a campaign is fun. Funding successfully is even more fun.
But what do you do after the funds clear?
At that point, you’re on the hook to keep your promises. But there’s a lot that goes into that. Here is what you need to do next.
#37: Fulfill your promises
Yes, it’s obvious, but it’s necessary. Ship rewards on time and keep your promises.
This is harder to do than you think. Most Kickstarters ship late, so if you manage to ship yours out on time, you’ll make a good impression.
Do this well and it will help build your credibility, keep your backers happy, and lay the groundwork for future success.
#38: Continue engaging with your community
Keep backers updated even after the campaign ends. Regular communication helps maintain the community you built during the campaign.
Share updates on product development, future plans, and any new projects. That way, you can keep in touch with the people you worked so hard to find in the first place!
#39: Launch a dedicated website
Use the momentum to continue promoting your product and attract new customers. A dedicated website allows you to showcase your product, provide updates, and also sell directly to new customers.
Kickstarter campaigns draw a lot of attention. You can use the visibility and community from your campaign to kickstart your eCommerce operations too.
#40: Create a newsletter
If you’re spending money collecting email addresses, you shouldn’t just email them once and then let the leads slip through your fingers. Keep backers and potential customers informed about your journey and future projects with regular updates.
Newsletters are a classic form of ongoing communication that can help you build a loyal community over time. Plus, it keeps your audience invested in your success.
#41: Seek feedback
Use your Kickstarter surveys – as well as any direct message conversations you have going – as a chance to understand what worked and what can be improved.
Gathering feedback from backers will help you understand your campaign’s strengths and areas for improvement. Then you can use this information to help you launch even better campaigns in the future!
Additional Tips
Kickstarter, both as software and as a cultural entity, is pretty complex. Some of the tips and tricks on how to use it don’t fall into a neat category. But you still need to know them!
Here is all the advice we can think of that doesn’t neatly fit into one of the previous categories.
#42: Use Kicktraq
Kicktraq is a cool website that’s been around for almost as long as Kickstarter. You can type in any Kickstarter URL and check out its funding data and a bunch of other stats. When you research other campaigns, this can help you get a feel for how their funding process went. For example, did they fund quickly or steadily over the course of weeks?
#43: Set stretch goals
Stretch goals motivate backers to continue pledging even after the main goal is met. While not required, they’re considered a tradition on Kickstarter.
If you decide to set stretch goals, clearly communicate what additional funds will be used for, such as enhanced features or extra rewards, to maintain excitement and support. And, of course, make sure you can actually ship your stretch goals!
#44: Create a sense of urgency
To some extent, the time-limited nature of Kickstarter campaigns already creates a sense of urgency. If you want to dial it up a little more, consider offering limited-time offers like early birds or rewards with limited quantities. This can encourage backers to pledge earlier and help boost campaign momentum.
#45: Proofread meticulously
Typos are bad. Check your spelling and grammar. Make sure there are no mistakes.
Yes, this is an obvious tip, but it’s so important. Putting effort into quality control shows people you care.
#46: Use a professional editor
If you can swing it, consider hiring an editor to polish your campaign materials. A professional editor can enhance the clarity, coherence, and overall quality of your content. They’re also more likely to catch typos that you miss.
#47: Optimize for mobile
Kickstarter is a bit unusual in that it’s common for creators to put most of their content inside of images rather than plain text. This advice flies in the face of traditional advice when it comes to mobile usability.
However, what you can do is make sure you check your campaign page on your phone. All the text needs to be clear and legible. Ideally, it shouldn’t take forever to load as well, although your ability to influence that is somewhat limited by Kickstarter’s page editing software.
#48: Include testimonials
If you have endorsements from early supporters or industry experts, share them on your page. Like with any other kind of product launch, testimonials can build credibility and trust with potential backers.
Highlight positive feedback and quotes that emphasize the value and quality of your project, because that will make it more appealing to prospective backers.
#49: Highlight previous successes
If applicable, mention past successful projects to build credibility. Showing your track record of successful projects can reassure backers that you can and will deliver on time. Also highlight key achievements and positive outcomes from previous campaigns to instill confidence in your current project.
#50: Be authentic and personal
Let your personality shine through in your campaign materials. Authenticity helps build a connection with backers.
Share your passion, vision, and the story behind your project in a genuine way. Personal touches can make your campaign more relatable and engaging.
#51: Invest in basic equipment
Use tripods, microphones, and proper lighting for a professional video. High-quality videos enhance your campaign’s appeal. Basic equipment like a stable tripod, clear audio from a microphone, and good lighting can significantly improve the production value of your campaign video, making it more persuasive.
You would be surprised how inexpensive quality equipment is on Amazon and other online stores can be. A $50 microphone and $40 tripod and ring light can go a long way. And if that doesn’t work – check with your local library, as many now have on-site recording rooms.
Because of how easy it is to create quality videos these days, you don’t have an excuse not to!
#52: Follow up with surveys
Gather backer feedback to improve future campaigns. Surveys are an effective way to understand backers’ experiences and gather insights for improvement.
Use this feedback to refine your approach, address any issues, and enhance future projects. Engaging backers in this way also shows that you value their input.
#53: Maintain momentum post-campaign
Keep the excitement alive with continuous marketing and engagement. After your campaign ends, continue to promote your product and engage with your backers.
Use social media, email updates, and your website to keep your audience informed and involved. Sustained engagement helps build a loyal community and drives ongoing interest in your project.
Crowdfunding is not just a way to get one high-profile success. If you use it properly, you can set up a business for the long run.
#54: Budget for shipping before you set reward prices
This might be the single most common mistake first-time Kickstarter creators make: they price their rewards based on production cost alone, forgetting that shipping costs (freight, customs, fulfillment, and postage) often equal or exceed the cost of manufacturing.
Before you finalize your reward tiers, get real quotes for:
- Manufacturing (per-unit cost at your expected volume)
- Freight from factory to warehouse
- Fulfillment fees (pick and pack, storage, supplies)
- Domestic and international postage
- Customs and VAT handling (if applicable)
Add these up, layer in Kickstarter’s ~9% in platform and payment processing fees, and then set your reward prices. If the math doesn’t work at your expected backer count, you need to either raise your goal, increase your reward prices, or find ways to reduce costs before you launch.
Our Kickstarter budget spreadsheet guide walks through this process step by step.
#55: Understand customs and VAT before you launch
If you’re shipping internationally—and most Kickstarter campaigns do—you need a customs strategy before you go live. Your options range from making backers pay their own import fees (simplest but worst backer experience) to using IOSS for EU shipments, storing inventory in multiple countries, or using Delivered Duty Paid shipping.
Each approach has different cost and complexity implications. The wrong choice can eat your margins or tank your backer satisfaction. Read our full breakdown of how to handle customs and VAT for Kickstarter to figure out which approach fits your campaign.
The key point: don’t wait until after you fund to think about this. By then, your shipping charges are already locked in and your options are limited.
Final Thoughts
It takes a lot of different skills to succeed on Kickstarter. This long list is evidence of that fact!
But don’t let the overwhelming size of this article scare you off the platform. Kickstarter is a proven way for upstart entrepreneurs to get noticed for a simple reason: because it’s a great place to try new ideas. Modern-day Kickstarter is a great place to build an audience, and lay the foundation for a lasting business.
Kickstarter success is not just about your launch day. It’s about everything you do leading up to it and everything you do after it. You don’t have to do everything perfectly – just focus on making something people want and being thoughtful in the way you get it to them!
Tools & Resources for Kickstarter Creators
Running a Kickstarter campaign involves a lot of moving parts. Here are some tools that can help at different stages.
Pre-Launch & Marketing
- LaunchBoom — Crowdfunding agency specializing in pre-launch marketing, landing pages, and ad strategy. They use a proven system for testing product-market fit before launch.
- Jellop — Kickstarter-partnered advertising firm that manages Meta ads for crowdfunding campaigns. Especially strong for campaigns with $50K+ goals.
Pledge Management & Post-Campaign
- BackerKit — The most widely used pledge manager. Handles surveys, add-ons, late pledges, and shipping address collection. Also offers its own crowdfunding launch platform.
- PledgeBox — A pledge manager alternative that handles surveys, upsells, and shipping tracking.
- Gamefound — A growing crowdfunding platform with built-in pledge management, especially popular for board games and tabletop projects.
Analytics & Research
- Kicktraq — Free tool for tracking campaign performance, trending projects, and historical funding data. Useful for benchmarking your campaign against others in your niche.
Shipping & Fulfillment
- Freightos — Online freight marketplace for comparing shipping quotes from factory to warehouse.
- SimplyDuty — Customs, duties, and tariff calculator. Useful for estimating import costs before you set your shipping rates.
- EAS — European tax compliance partner for IOSS and UK VAT registration.
- Fulfillrite — Order fulfillment for Kickstarter and eCommerce with warehouses in the US. Handles pick-and-pack, international shipping, kitting, and customs coordination.
Already at 500+ backers and wondering how you’ll ship it all?
That’s the scale where DIY fulfillment breaks. We’ve shipped 2,000+ Kickstarter campaigns, including over 70 for Calamityware alone.
Reach out today and you can get a clear quote on what it will cost to ship your campaign.
You’re ready to launch your Kickstarter campaign any day now. But you’re worried about taxes and VAT, customs, duties, and tariffs.
How are you going to handle that for your Kickstarter?
Customs & VAT may seem very complicated, and we won’t sugarcoat it—they are. But with a little bit of planning, you can handle your Kickstarter backers’ customs with ease. In this article, we will discuss four ways you can do so.
Please note: we are writing this article assuming that you’re doing business in the US. If you’re not, though, most of the advice in this article still applies.
How Customs & VAT Work
The whole idea behind customs is to allow different countries to control the flow of goods in and out of their borders. Customs agencies are responsible for making sure that every business shipping goods into the country is following the law and paying the right taxes.
Customs duties—often referred to as tariffs—are taxes imposed when goods cross international borders. These taxes are based on tariff codes, which correspond to the type of item being exported or imported. VAT, or value-added tax, is a tax that countries apply based on a percentage of the item’s sale price.
To simplify: many times, when your Kickstarter backer in a foreign country imports your item, someone will have to pay for customs duties and/or VAT.
Customs and VAT don’t apply to everything. Many countries do not have VAT at all, so that often does not apply. Customs duties only apply if the imported good’s value exceeds the importing country’s “customs de minimis value.” (A similar principle applies to VAT). But beyond that, you may owe customs.
Lastly, you might be saying “how do tax authorities know what an item is worth?” Simply put, you—the sender—tell them. The value you tell them is the declared value.
How Tariffs & De Minimis Changes Affect Kickstarter Campaigns
The elimination of the US de minimis threshold for certain countries has fundamentally changed international shipping for crowdfunding campaigns. Previously, small packages under $800 could enter the US without going through the whole formal customs process.
Now, virtually all international shipments require proper documentation, and most will come along with tariff/customs fees as well.
This change particularly impacts creators shipping rewards internationally. Even low-value items like pins, stickers, or small accessories now require accurate customs declarations and may face duties. For Kickstarter creators, this means every international shipment needs proper HS codes, commercial invoices, and customs processing—significantly increasing the amount of administrative overhead.
All these recent changes to tariff policies have also had the effect of making international shipping costs less predictable. Products that previously faced minimal duties may now encounter substantial tariffs depending on country of origin and product classification.
These changes make the four methods outlined below even more critical to understand and plan for during your campaign.
4 Ways Your Kickstarter Can Handle Customs & VAT
In this section, we’re going to talk about four ways you can handle customs and VAT for your Kickstarter campaign. You can generalize these lessons to business as a whole, though, even if you aren’t using crowdfunding.
To help us give you the best possible advice, we’ve reached out to Robert Ruutsalo, Chief Revenue Officer at EAS. In their own words, EAS is “your trusted partner for European tax compliance.” When it comes to customs and VAT matters, including IOSS and UK VAT, they’re the best people we know to answer.
With that context in mind, let’s talk about four ways you can handle these tiresome taxes.
1. Use the IOSS/UK VAT Scheme (EU & UK Only)
Up until 2021, there were basically three ways to handle customs and VAT for Kickstarter. You could make backers pay for fees, store inventory in other countries, or use delivery duty paid (DDP) shipping.
The Import One Stop Shop (IOSS) was rolled out to simplify and expedite customs clearance. In Ruutsalo’s words, “for shipments to the EU, the IOSS is a cost-effective way for Kickstarter creators to manage VAT for goods valued at €150 [about $165 USD] or less. This allows creators to collect VAT at the point of sale, simplifying customs and ensuring that backers receive their rewards without additional customs fees upon delivery.” [Emphasis ours.]
Ruutsalo goes on to clarify that “it’s important to note that IOSS applies only to EU countries, but a similar VAT system is in place for shipments to the UK, where you can collect and remit VAT for low-value goods in the same manner. For US merchants with many backers in Europe, using IOSS for the EU and UK VAT registration can significantly streamline customs clearance and reduce the chance of delays.”
You may wonder where it makes the most sense to use IOSS for Kickstarter. In response to that question, Ruutsalo states that “IOSS is ideal for campaigns with smaller items and a significant number of EU backers. Compared to other methods, it offers a cheaper and faster way to handle customs for low value shipments, reducing the complexity of dealing with multiple tax authorities.” [Emphasis ours.]
It should be noted, however, that IOSS is complex to understand. If you want to take advantage of it, your best bet is to work with a professional such as EAS.
2. Make Backers Pay For Fees
You have another option when it comes to customs and VAT, and it’s deceptively simple. Do nothing.
The benefit of this method is clear: it’s very easy. Even Kickstarter itself does not require Kickstarter creators to specify how customs will be handled. They merely recommend it.
Kickstarter creators are not obligated to go out of their way to ensure that backers don’t pay customs. In fact, up until really recently, many low-value items fell under the customs de minimis of most countries, making it not worthwhile to try to create a “customs-friendly” campaign. What’s more, many international backers are accustomed to paying for customs and VAT for Kickstarter campaigns that they receive.
It’s not hard to imagine the problems you might encounter if you do take this path, though. In Ruutsalo’s words, “this option pushes the responsibility of paying customs duties and taxes to the backers, which can lead to a negative experience if they are surprised by additional fees upon delivery.”
Put another way, it might make people mad!
But Ruutsalo doesn’t dismiss this path entirely, saying that “this option may work for smaller campaigns or those that do not expect to have significant international backers.” But he cautions that “it can be risky in terms of customer satisfaction for larger campaigns.”
We can help you with customs, VAT registration, and international fulfillment for Kickstarters.
If you’re staring down 500+ international backers and wondering how you’re going to get them their rewards, that’s what we do.
Calamityware has shipped 70+ Kickstarter campaigns with us, including international.
Reach out today to see if it’s a good fit.
3. Store Inventory in Multiple Countries
“Customs-friendly” is a phrase you will see a lot of on Kickstarter if you look. You can often find variants of it such as “EU-friendly,” “UK-friendly,” “Canada-friendly,” and “Australia-friendly.” This is generally understood to mean one of the following:
- Goods are shipped from within a country or region, avoiding import fees and taxes.
- Goods are below the customs de minimis value.
- The import fees are handled on behalf of the backer. (This is a definition we have added on our own, based on our understanding of backers’ underlying needs.)
So with this in mind, it makes sense that if your Kickstarter rewards exceed the customs and/or VAT de minimis values of the countries you plan to ship to, that you must split your inventory between warehouses in different regions in the world. Many board game Kickstarters, for example, have a warehouse in the US, one in the EU, one in Australia, one in Canada, and so on.
This approach has a number of benefits. Backers receive their rewards pretty quickly after shipping since the warehouse is in their country. What’s more, they never see Kickstarter-related customs or VAT fees.
But there are some downsides to be aware of too:
- You have to coordinate multiple freight shipments to different warehouses in different countries, which can become complex. For smaller campaigns, this can be prohibitively expensive.
- When each of those freight shipments docks, you have to pay customs. Granted, the customs fees will be levied on the wholesale value of the goods and not the retail value, but this can still add up depending on how many countries you ship to.
- It’s complex. The more warehouses you’re working with, the more room there is for errors, customer service issues, delays, and unexpected bills.
“It’s a complex and expensive solution that may not make sense for smaller campaigns, especially when the high upfront costs outweigh the benefits,” says Ruutsalo.
4. Use Delivery Duty Paid (DDP) Shipping
There is one last way you can handle customs & VAT for your Kickstarter campaign. It’s tempting to think that if you are unable to split your inventory between different warehouses or if you don’t want to deal with IOSS, that you are out of luck when it comes to customs & VAT. You may think that you have to default to Method #2.
We’re here to tell you that there is a viable middle ground. You can house your inventory in the US, ship internationally, and avoid having your backers pay customs & VAT. The trick is that you must use “delivery duty paid” shipping.
“In DDP shipping,” says Ruutsalo, “the creator covers all customs duties and taxes upfront, ensuring that backers receive their packages without any surprise fees. This approach creates a seamless experience for backers but is more expensive than IOSS/UK VAT, for shipments to the EU or UK under €150. DDP involves paying duties and taxes on all orders, which can significantly increase costs for creators, particularly for high-volume campaigns.”
“For US merchants shipping to Europe, IOSS/UK VAT is the more affordable solution for low-value goods, as it eliminates customs fees for backers while keeping costs lower than DDP. DDP is more suitable for high-value items or campaigns where maintaining a premium backer experience is essential, but it should be used cautiously as it can cut into profit margins.”
Our experience lines up well with Ruutsalo’s. We’ve found that DDP shipping is generally more expensive than using IOSS/UK VAT, though some prefer to go that route due to either high-value goods or a strong preference to not deal with IOSS, either directly or through a third party.
Which Method Is Right for Your Campaign?
Every campaign is different, and the right customs strategy depends on your budget, backer count, and how much complexity you’re willing to take on. Here’s a side-by-side comparison.
| IOSS / UK VAT | Backers Pay Fees | Multi-Country Warehouses | DDP Shipping | ||
|---|---|---|---|---|---|
| Creator Cost | Low–moderate (registration + compliance) | Lowest (no action required) | High (multiple freight shipments + customs on each) | Moderate–high (duties + taxes on every package) | |
| Backer Experience | Smooth, no surprise fees at delivery | Poor, unexpected charges on arrival | Best., domestic shipping, no import fees | Smooth, no surprise fees at delivery | |
| Complexity | Moderate (need IOSS/VAT registration or a partner like EAS) | Very low | High (coordinating multiple warehouses and freight lanes) | Low–moderate (your carrier or 3PL handles it) | |
| Best for | Campaigns with many EU/UK backers shipping items under €150 | Small campaigns or campaigns with few international backers | Large campaigns with thousands of international backers across multiple regions | Mid-sized campaigns wanting a premium backer experience without multi-warehouse logistics | |
| Limitation | EU/UK only; items must be under €150 for IOSS | Backers may refuse delivery or leave negative feedback | Expensive and logistically complex for smaller campaigns | More expensive than IOSS for EU/UK shipments under €150 |
Most campaigns end up using a combination. For example, you might use IOSS for EU backers, UK VAT registration for UK backers, and have backers in smaller markets pay their own fees. Talk to your fulfillment partner early to figure out which mix makes sense for your project.
How Can I Make Kickstarter Customs Clearance Easier?
Seeing how much of a hassle it can be to handle customs clearance and VAT, you may wonder what you can do to cut down on the difficulty.
In response to that Ruutsalo says “the single most effective way to make customs clearance easier is to provide accurate and complete documentation upfront. This includes correctly filled-out commercial invoices, precise product descriptions, appropriate HS codes, and clear shipping labels. These details ensure that customs officials can process shipments swiftly, reducing the risk of delays or additional fees.” [Emphasis ours.]
He goes on to state that for the EU and UK, using IOSS dramatically streamlines the process. That’s because IOSS allows you to use a single VAT identification number of all EU countries, which makes cross-border compliance easier. The same basic principle applies to UK VAT, even though it is outside of the EU.
How Do You Find a Good Customs Broker?
If you’re like a lot of creators, the idea of dealing with international trade at all is migraine-inducing. So you may want to hire a customs broker just to avoid the trouble altogether.
If you choose to do that, there are a few things you need to know. To quote Ruutsalo, “finding a reliable customs broker is crucial for smooth international shipping, but it’s important to note that for EU and UK shipments using IOSS and UK VAT, a customs broker is not required for goods valued at €150 or less. These schemes simplify the process, allowing you to manage VAT and customs clearance without needing a third-party broker.” So first, make sure you need one!
If you determine that you need a broker, Ruutsalo suggests focusing on these three factors:
- Experience and Specialization: You want a broker who is experienced with both eCommerce and crowdfunding.
- Global Reach: Your broker needs to have a strong network in key shipping regions like the US, EU, UK, and beyond.
- Clear Communication: Their pricing needs to be sensible, have no hidden fees, and they should keep you informed of the status of your shipments and any regulatory changes that might impact deliverability.
Should you find yourself needing a customs broker, looking for someone who checks these boxes will help you feel confident that you’ve made the right call.
Given the uncertainty that tariffs and the removal of the de minimis exemption have added to global trade, we strongly recommend that you find a customs broker. (And if you need help finding one and you’re a customer of Fulfillrite, please note that we do provide tariff assistance services on request.)
Final Thoughts
Handling customs and VAT might feel scary, especially if it’s your first Kickstarter campaign. But if you approach it the right way, you can prevent a lot of issues and streamline the process.
You have four practical options: IOSS/UK VAT registration, letting backers pay fees, storing inventory in multiple countries, or DDP shipping. Each method has its pros and cons, and many campaigns use a combination of approaches depending on the destination.
Choose the methods that fit your campaign’s size, budget, and backer expectations. As long as you plan well and get your documentation right, customs won’t be an obstacle to your Kickstarter’s success.
FAQ
What are customs?
Customs are fees charged by a government when goods are imported or exported. These charges are applied to ensure goods meet legal requirements and can include taxes or duties. Customs charges are often called tariffs.
What is VAT (value-added tax)?
VAT is a tax added to a product at every step of production or sale. The final buyer usually pays it, while businesses collect it for the government.
What is the IOSS?
The IOSS (Import One-Stop Shop) is an EU system for managing VAT on low-value imports. It allows sellers to collect VAT at the point of sale, making it easier for goods under €150 to clear customs and avoid extra charges on delivery.
What are tariff codes or HS codes?
Tariff or HS codes are numbers used to classify products in international trade. They help apply correct taxes, track shipments, and ensure compliance with trade laws.
Let’s say you’re a single parent. Your kids just went to bed and now it’s 7 o’clock at night. And now it’s time for you to start your workday—the one that might, eventually, pay you.
So you work until midnight. Sometimes even 1 in the morning. And you do this night after night for two and a half years without a salary.

That was Jenny Brown’s reality while building Pampeano, her luxury Argentine leather goods brand. Today, Pampeano is stocked in Harrods, John Lewis, and over 300 retailers worldwide.
The brand’s signature hand-woven belts—featuring the distinctive “pampa diamonds” design—take up to five hours each to craft in family workshops in Buenos Aires. Each belt tells the story of Argentine craftsmanship, vegetable-tanned leather, and a founder who refused to quit when things got impossibly hard.
And make no mistake: the journey from Jenny’s initial sabbatical in Argentina all the way to prestige UK retailers involved plenty of challenges along the way. Among them were expensive mistakes, brutal macro shocks like Brexit, and getting quite literally booted out of a John Lewis meeting after two minutes, as well as finding ways to build a business around bedtime stories and school pick-ups.
This is the story of how Jenny Brown turned evocative leather shops in Argentina into a brand that now serves everyone from individual customers to prestigious UK regiments and institutions.
Pampeano Started With A Sabbatical in Argentina
Jenny Brown’s career before Pampeano reads like a standard high-achiever trajectory: physics at university, finance at Goldman Sachs and Morgan Stanley, an MA in real estate, residential fund management at Grosvenor. But as she puts it, she “wasn’t a very good employee.”
After several years in the city and while caring for her then-ill father, Jenny needed a break. “I was keen to take some time out and my employers were supportive of that,” she explains. “Argentina seemed like the perfect destination—rugged landscapes, incredible culture, and a slower pace of life.”
What started as a sabbatical became something else entirely when Jenny discovered Argentina’s leather workshops.

“While there, I became aware of the outstanding quality of craftsmanship with products made in natural materials—leather, wood, silver, wool,” Jenny recalls. “I’d go into ‘talabaterias’—shops that are unlike anything I’d seen in Europe—they were the most stunning shops that visiting friends and I thought ‘wow, can we bring some of this to Europe’.”
It wasn’t just the visual appeal. It was everything. “The quality, the craftsmanship, the evocative smells (especially of vegetable tanned leather), the story behind each piece—it struck me immediately that this could translate into something much bigger and my friends encouraged me to follow the nascent idea of Pampeano.”
In 2008, Jenny made the decision to start her own business importing high-quality leather goods from South America. She soon discovered she was much more motivated working for herself than for someone else.
But motivation alone doesn’t build a business—especially one based on artisan partnerships thousands of miles away.
Building Trust With Artisans
The leather workshops Jenny found in Argentina weren’t factories. They were family operations where skills had been passed down for generations. These artisans had no interest in mass production or transactional relationships with foreign buyers.
“Trust and respect were everything,” Jenny says. “These were family workshops where skills had been passed down for generations, and they weren’t interested in mass production. I spent months living there, learning their stories, sharing meals, and showing that I valued their artistry. It became a partnership built on mutual respect rather than transactional business.”
This wasn’t a quick trip to source products and negotiate contracts. Jenny embedded herself in the community. She learned the craft, understood the time and skill involved, and proved that she wasn’t just another buyer looking to extract value.
The reality of what these artisans do is staggering. Each Pampeano belt takes up to five hours to hand-weave. Four of those hours are dedicated solely to the hand-weaving process. High-density waxed yarn is painstakingly looped around premium A-grade vegetable-tanned leather that’s been stamped into the desired pampa design.
The artisans who can do this work perfectly are among the most skilled and experienced in Argentina. It’s not a process you can rush or automate without losing the soul of the product.
The design itself became Pampeano’s signature. “The design is rooted in the landscapes I was surrounded by—the sharp silhouettes of the Andes and the infinite horizon of the pampas,” Jenny explains. “Translating that into geometric stitching felt natural, but it was only once I saw the belts lined up, all bearing this motif, that I realized we had a distinctive visual language. It gave pampeano (lower case ‘p’!) an instantly recognizable DNA.”
Those “pampa diamonds” now appear on every Pampeano product—an instantly recognizable pattern that carries the heritage of Argentine polo culture and the landscapes that inspired it.
Learning From Expensive Mistakes
Jenny is refreshingly honest about her early mistakes. When asked about the biggest ones, she doesn’t hesitate: “Oh, plenty.”
“I invested heavily in luxury travel bags at the start, which were beautiful but far too expensive to sell at scale and before we were a known brand,” she admits. “I also underestimated logistics, cash flow and the biggest of all—how long it takes to build a business.”
The luxury bags were a classic entrepreneur mistake: building what you think is impressive rather than what customers will actually buy at scale. Beautiful doesn’t always mean viable, especially when you’re an unknown brand trying to establish yourself.
Then came the macro shocks, those awful events completely outside Jenny’s control that threatened the entire business.
“Macro shocks (the UK referendum in 2016, Covid, Truss budget in 2022) really hurt notably for the collapse in GBP,” Jenny explains. “Getting through those periods was tough!”
When you’re importing products priced in dollars and selling them in pounds, currency fluctuations aren’t abstract economic theory. They’re existential threats.
The pivot from bags to belts was “partly necessity, partly listening.”
“Friends and customers loved the belts—they were more affordable, easier to gift, and carried the essence of the brand,” Jenny says. “Switching focus allowed us to build awareness quickly without the financial risk of large inventory. Belts became our foundation, and from there, we expanded sustainably.”
It was the right strategic move, but it didn’t make the early years any easier financially.
For two and a half years, Jenny didn’t pay herself a salary.
“It was tough. I lived frugally, leaned on savings, and honestly just had a lot of grit,” she recalls. “What kept me going was the belief in the brand and the encouragement of people around me who saw its potential. I treated every small win—like our first stockist—as fuel to keep going.”
Those mistakes taught her critical lessons: “to listen to customers, test ideas small before going big, and be pragmatic rather than romantic about the business.”
That pragmatism would prove essential for what came next.
Single Parenthood & Going To Bed at 1 in the Morning
Building a business is hard. Building a business as a single parent is something else entirely.
“It was survival mode, really,” Jenny says. “I built systems out of necessity—delegating what I could, automating where possible, and carving out strict routines.”
The routine looked like this: handle what she could during the day, be present for her kids, and then start the real work after bedtime.
“Sometimes it meant taking calls at school pick-up (I really tried to avoid this) but most typically working late nights after bedtime,” Jenny explains. “I’d start work again at 7pm when they were little, and would work until 11-12-1am very typically.”
That’s not hyperbole or exaggeration. That was the actual schedule, night after night, for years.
But there was one non-negotiable: “Bedtime mattered most—cuddles and stories!”
No matter how urgent the business demands, Jenny protected that time. The work could wait until 7pm. Bedtime was sacred.
Her advice for other single parents or mothers considering entrepreneurship cuts through the noise of “having it all” mythology:
“Don’t buy into the myth that you have to ‘do it all.’ You can’t—and that’s okay. Focus on what only you can do, build support systems around you, and be kind to yourself. Progress doesn’t have to be perfect to be meaningful and slow is natural. You’re not going to build something sustainable overnight.”
That last line is key: “slow is natural.” The pressure to scale fast, grow quickly, and hit arbitrary milestones ignores the reality that sustainable businesses take time—especially when you’re building them around school pick-ups and bedtime.
Surviving Brexit
If two and a half years without pay while working until 1am wasn’t hard enough, then came Brexit.
“It was brutal,” Jenny says. “Overnight, our costs shot up because everything we bought was in dollars. We had to renegotiate contracts, tighten expenses, and hedge currency risk where possible. It forced us to become sharper financially and to diversify markets more aggressively.”
When the pound collapsed, Pampeano’s costs didn’t just increase—they skyrocketed. Everything was purchased in dollars from Argentina. Everything was sold in pounds in the UK. The exchange rate shift meant margins disappeared overnight.
Sales in Europe halved.
The response? Open a warehouse in Holland.
“It wasn’t so much a choice as survival,” Jenny explains. “If we wanted to keep serving European customers without endless delays and tariffs, we had to be on the continent. Was it scary? Yes. But it ended up being a strategic move that not only solved logistics but also gave us a stronger foothold in the EU market.”
Opening a warehouse in another country when your sales have just halved takes either desperation or strategic vision. In Jenny’s case, it was probably both.
But that investment paid off. The Holland warehouse solved the immediate logistics problem while positioning Pampeano for long-term growth in the European market.

Breaking Into Harrods
Getting luxury products into prestige retailers like Harrods and John Lewis isn’t about luck. It’s about persistence, presentation, and sometimes getting a second chance after spectacular failure.
“Persistence and presentation,” Jenny says. “We made sure our story and craftsmanship were impeccable, and we knocked on doors until someone listened. With big retailers, you often only get one chance, so we came prepared.”
Except when you don’t get it right the first time.
“Actually when I first met John Lewis in approx 2011, I got it spectacularly wrong; we were booted out after 2 minutes!” Jenny admits. “We did get a meeting again about 4 years later and nailed it!”
Think about that. Getting kicked out of a meeting after 120 seconds. Most entrepreneurs would take that as a definitive rejection and move on. Jenny waited four years, got another meeting, and this time came prepared.
Today, Pampeano is stocked across John Lewis stores and featured in their Christmas gift guides. That 2-minute disaster became a long-term retail partnership.
But Jenny’s careful to balance prestige stores with smaller retailers.
“At the same time, I’ve always been careful to balance prestige stores with small boutiques—they’re the soul of our business and give us reach and authenticity,” she explains.
The big department stores provide credibility and volume. The small boutiques provide community, authenticity, and the personal relationships that keep a brand grounded.
And then there’s the B2B business, which is something that emerged organically from customer requests.
“It started with a single request—a school asking if we could weave their colors into belts,” Jenny recalls. “Word spread, and suddenly we were making pieces for regiments, clubs, and institutions. Today, it’s a significant slice of the business, and we provide belts for some of the most prestigious UK institutions. It’s incredibly rewarding because those belts carry real meaning for the groups who commission them.”
What began as a one-off custom order turned into an entire revenue stream. Schools, military regiments, clubs, institutions—all wanting belts woven with their specific colors and identity. Each piece carries genuine meaning for the organization that commissions it.
That’s the kind of business you can’t manufacture through strategy documents. It comes from listening to what customers ask for and being willing to say yes to opportunities that don’t fit the original business plan.
Switching From .co.uk to .com
For a brand building international recognition, having a .co.uk domain was limiting. Jenny wanted pampeano.com—the obvious choice for a global brand.
“It was about legitimacy and global reach,” she explains. “A .co.uk [domain] felt limiting, especially as we grew internationally. The negotiations were long and frustrating (on and off over 10 years to agree a sensible price!), but owning pampeano.com was worth it. It gave us credibility and a digital home that matched our ambition.”
Ten years. On and off negotiations for a decade to acquire the domain name that should have been hers from the start.
But she got it. And she’s right—it mattered. A .com signals global presence in a way that country-specific domains don’t. For a brand with aspirations beyond the UK market, it was essential.
Convincing Customers to Pay Premium Costs
When you’re selling belts that take five hours to hand-weave and cost significantly more than mass-produced alternatives, you have to educate customers about why they should care.
“Storytelling is key,” Jenny says. “We explain that each belt takes up to five hours to hand-weave, that the leather is vegetable-tanned, and that no two are ever quite the same. When customers understand the time, skill, and heritage involved, they see the value. It’s about shifting the mindset from disposable fashion to lasting investment.”

The challenge is competing against a culture of fast fashion where belts are disposable accessories, not investment pieces.
“We get copied a lot but the quality and authenticity are unmatchable,” Jenny notes.
Imitation is inevitable when you create something distinctive. But the copies can’t replicate the five hours of hand-weaving, the relationships with family workshops in Argentina, the vegetable-tanned leather, or the heritage behind each piece.
When customers understand what they’re actually buying—not just a belt, but a piece of Argentine craftsmanship that will develop character over time—they’re willing to invest in quality over quantity.
Final Thoughts
Jenny’s journey with Pampeano continues, though not exactly as she’d planned.
“I haven’t stepped back; I had an MD in place but it didn’t work out unfortunately,” she says. “I’m back at the helm and loving it.”
Sometimes the attempt to step back and delegate reveals that the founder’s involvement is still essential. Jenny’s back running the business full-time—and she’s embracing it.
Today, Pampeano is distributed through over 300 retailers worldwide. The brand is stocked in Harrods, John Lewis, and prestige boutiques across the UK and Europe. The B2B business serves schools, regiments, clubs, and institutions with custom-woven belts that carry genuine meaning.
Theclassic leather belts featuring the signature pampa diamonds remain the foundation, but the product line has expanded to include dog collars and leads, bags, and accessories. All the while maintaining the same commitment to Argentine craftsmanship and hand-weaving.
The brand DNA remains unchanged: distinctive design rooted in Argentine landscapes, vegetable-tanned leather, artisan partnerships built on respect and trust, and products that take hours to craft rather than minutes to manufacture.
After 15+ years of late nights, macro shocks, currency collapses, and persistence, Jenny has built something that matters—a brand that honors traditional craftsmanship while serving modern customers who value quality and heritage.
You can explore their full collection at pampeano.com.
Key Takeaways
Did you read this piece looking for tips on how to grow your own business? Here are some things that stood out to me.
Start small, test before scaling.
Jenny’s most expensive mistake was investing in luxury bags before building brand awareness. Belts were more affordable, easier to send as gifts, and let her build the business at a sustainable pace. So it’s a good idea to test ideas small before committing big resources to unproven concepts.
Artisan partnerships require time and respect.
Spending months in Argentina, sharing meals, and learning stories were all forms of investment. Those relationships created partnerships that have lasted decades, and went beyond simple transactional vendor relationships. Trust takes time to build, especially across cultures and industries.
Macro shocks will happen, which is why you need to build resilience.
Brexit, COVID, and currency collapses all happened while Jenny was running Pampeo. You can’t predict them, but you can become sharper financially, diversify markets, and make strategic moves like opening a warehouse in Holland when circumstances demand it.
Second chances exist if you show up prepared.
Getting booted out of John Lewis after 2 minutes didn’t end the relationship. Coming back four years later and nailing it proved that persistence and preparation matter more than one bad meeting.
Progress doesn’t have to be perfect.
Two and a half years without pay, working until 1am, building slowly while managing single parenthood is the reality of bootstrapping. Slow is natural and sustainable, despite what startup culture suggests.
Storytelling justifies premium pricing.
When customers understand that each belt takes five hours to hand-weave with vegetable-tanned leather from family workshops in Argentina, they see value beyond price tags. Education transforms price resistance into appreciation for craftsmanship.
B2B can emerge from B2C.
One school request for custom colors turned into a significant business serving prestigious UK institutions. Listen to what customers ask for. Sometimes they’re showing you new revenue streams you never planned for.
Protect what matters to you most.
No matter how urgent the business demands Jenny was facing, bedtime stories were non-negotiable. The work could wait until 7pm. Building a sustainable business means protecting the things and people that keep you grounded and motivated.
Most startups don’t make it to year two. Even fewer turn a profit in year one. And almost none survive 25+ years while major competitors like Teavana shut down.
Michael Cramer’s Adagio Teas did all three.
In 1999, during the headiest days of the dot-com boom, Michael left investment banking. It was then that he went on to co-found a loose-leaf tea company with his mother and brother. They operated out of a basement with minimal overhead and sold directly to customers via a then-emerging channel called eCommerce.

They were profitable from year one.
Today, Adagio serves over a million customers from facilities in New Jersey, California, and the UK. Their store boasts more than 100 types of tea sourced directly from farms of origin.
The company created the ingenuiTEA self-filtering teapot, pioneered a $2 sample program that prioritizes lifetime value over average order value, and built a business model that balances curated quality with customer customization.
They survived the shift from pure eCommerce to omnichannel retail, maintained direct relationships with tea farmers across Asia, and outlasted better-funded competitors.
This is the story of how a Russian immigrant with an MBA and banking experience built a family tea business that’s thrived for over two decades by honoring the leaf, listening to customers, and playing the long game.
Russian Tea Culture Meets Dot-Com Boom
Michael Cramer grew up in Moscow where tea wasn’t just a beverage. It was a ritual, a way to pause, reflect, and connect. “Tea was woven into my childhood and cultural identity,” he explains. “In our household, it wasn’t just a beverage but a ritual, a way to pause, reflect, and commune.”
Even though much of Russian and post-Soviet tea culture relied on tea bags or strong black blends, Michael developed an early sensitivity to quality, subtlety, and the story behind a cup. Later, when he lived abroad, he encountered loose-leaf teas with their depth, aroma, and diversity.
That’s when he realized something: “There was a kind of ‘missing link’ between that richness and what many people in the U.S. had access to.”
Michael’s mother had long nurtured this passion for tea, serving special blends to guests and experimenting with flavors. When Michael and his brother were grown, they saw an opportunity. The Internet in the late 1990s unlocked a chance to bring better teas to people everywhere, not just locally.
“I see the seed of the business in a fusion,” Michael says. “Cultural memory + a gap in the U.S. market + the emerging power of eCommerce at the time.”
But Michael wasn’t a tea merchant. He was an investment banker with an MBA from INSEAD. Walking away from finance to start a tea company felt risky.
“The idea of building something real, tangible—tied to nature, culture, human connection—was more compelling to me than financial markets,” he explains.
In 1999, Michael, his mother, and his brother co-founded Adagio Teas. The name comes from the Italian musical term meaning “slow” or “at ease”—representing tranquility and the philosophy of savoring rather than rushing.
How Adagio Teas Turned A Profit on Year One
First-year profitability is remarkable for any startup. For an eCommerce business launched in 1999, it’s especially remarkable. Michael attributes it to a mixture of factors.
They started lean and operated from home, later from a basement, with minimal fixed costs. No expensive office space, no large team, no investor pressure to spend fast and scale faster.
They differentiated fast. Even with limited selection early on, their teas were fresher and more flavorful than many competitors. That quality let them command higher margins. Consumers had few alternatives for gourmet loose-leaf tea in 1999. Adagio was filling a genuine gap in the market.
Adagio also started selling directly before that was commonplace. By leveraging the emerging Internet, they cut out middlemen and reached customers directly with less margin leakage.
They were also nimble too. Decision-making was fast, capital was committed, and they didn’t have to prove anything to external investors. That freedom let them iterate quickly.
Michael’s banking background provided critical advantages: “Discipline, financial rigor, risk assessment, structuring operations, capital management, negotiating, forecasting. It gave me a language for scaling, for understanding margins, for making prudent investments.”
But that background also came with habits he had to unlearn.
“In finance, speed, shortcuts, and abstractions sometimes trumped patience and craftsmanship,” Michael admits. “Transitioning to a business rooted in agriculture and product required humility, openness, and respect for cycles. Overall, the skill set from banking gave me a foundation; but tea taught me patience, listening, and that sometimes slower is wiser.”
That philosophy—adagio, at ease, unrushed—became central to how the business operated.
“We view ‘adagio’ not as slowing everything down, but as creating space for intention, thoughtfulness, and savoring,” Michael explains. “In operations, that means choosing quality over mere speed: ensuring freshness, careful handling, honoring the journey from farm to cup. We don’t rush the leaf.”
Building Direct Relationships With Farmers
Early on, Adagio sourced tea through intermediaries. But Michael quickly realized that freshness, trust, and knowledge of provenance demanded closer ties.
“We began traveling, visiting auctions, meeting brokers, then meeting farmers directly in Asia,” he says. “Over time, we cultivated partnerships built on respect, transparency, and mutual benefit.”
His INSEAD education proved invaluable here. The business school’s global emphasis exposed him to diverse cultures, international negotiation, and cross-cultural management.
“When we began forging relationships with tea growers across Asia, that mindset of cultural humility, listening, adapting, and bridging different expectations was essential,” Michael explains. “I could more confidently engage in dialogues, assess risk in currency, logistics, quality, and also empathize with counterparts whose context was foreign to me.”
Today, Adagio’s supply chain follows a clear path:
- Direct negotiation/contract with farmer or small estate – setting quality, price, volume, delivery timing
- Harvest/processing oversight/sampling – when possible, sampling in-region, third-party tastings, or sending team members
- Export/shipping/quality control – dealing with customs, logistics, ensuring leaves are handled well
- In-house testing/grading/blending – further inspection, grading, blending, packaging
- Warehousing/distribution/fulfillment – from NJ/CA/UK facilities to customers or retail partners
“We view the relationship as ongoing collaboration, not transactional,” Michael says. “We want to invest in quality, consistency, and transparency so both sides benefit.”
This direct sourcing model also enables something most tea companies can’t offer: traceability. Customers can trace their teas back to the farms of origin—seeing which farm, which harvest, and understanding the story behind their cup.
Responding to Pain Points
Michael describes high-end tea as “like the new wine” with different varietals despite coming from the same plant. Tea is highly sensitive to region, altitude, soil, climate, harvest time, and processing. Even leaves from the same plant can yield dramatically different cups.
But there was a problem: loose-leaf tea intimidated many customers. From their perspective, it seemed messy, complicated, and time-consuming.
So to respond to this pain point, Adagio introduced the ingenuiTEA. It’s a self-filtering transparent teapot that solved the “loose leaf is messy” problem.
After steeping leaves in boiled water, you place the pot on a mug, and a filtering system drains brewed tea into the cup through a valve. The gravity-based design uses no force to strain leaves, unlike French press teapots that crush and bruise them.
“Product ideas like ingenuiTEA are responses to those frustrations,” Michael explains. “At the same time, we see ourselves as educators. Some customers don’t even know better brewing is possible. So when we design a tool, we also provide supportive content, demonstrations, usage tips, and context so people appreciate why it’s better.”
The approach to product development blends customer empathy with education: “We listen closely to customer pain points. But we also educate the market on better ways to brew. We test prototypes, collect feedback, refine—often launching tools in small batches before scaling.”
Beyond tools, Adagio offers over 100 types of tea plus the ability for customers to create custom blends. Balancing curation with customization required thoughtful design.
“We see curation and customization as complementary,” Michael says. “Too much freedom without guidance can overwhelm consumers; too strict curation can feel restrictive.”
Their approach includes highlighting curated bestsellers as entry points, filtering by taste profiles, safe sampling with small purchases, custom tools with guardrails, and community feedback through user ratings. The “Signature Blend” program lets customers create blends, share them, and allow others to buy them.
“We provide structure, suggestions, and boundaries—but let motivated customers explore within them,” Michael explains.
The $2 Sample Strategy
In a world obsessed with maximizing average order value, Adagio does something counterintuitive: they sell samples for $2, making it low-risk to try new teas.
“We believe that lowering the barrier to trial is a powerful driver of trust and long-term loyalty,” Michael says. “When someone is hesitant to commit to a full size, a $2 sample gives them confidence. If they like it, they’ll come back and buy full amounts (often multiples), and they may try additional teas.”
The sample program helps with customer acquisition, reduces returns and dissatisfaction, enables cross-selling and exploration, and increases lifetime value.
“Though sample sales don’t maximize gross per order, they maximize the funnel, retention, and long-term margins,” Michael explains. “It’s a long-term mindset over short-term lift.”
Expanding Into Physical Retail
Adagio started as pure eCommerce in 1999, later expanded to retail partners like Bed Bath & Beyond and Amazon, then opened three company-owned retail locations in Chicagoland.
The move into physical retail was driven by several factors:
“Brand experience matters: tea is sensory,” Michael explains. “A store lets customers smell, taste, touch—creating deeper connection than a screen can. Discovery and trust: for many consumers, walking into a shop validates the brand and encourages trial.”
Physical presence also creates omnichannel synergy. Stores reinforce online and vice versa.
What they learned from retail surprised them. Customers linger—averaging 30 minutes in-store with an average transaction of $26. Staff must be trained and passionate, becoming brand ambassadors.
Inventory, displays, and lighting matter for converting walk-ins. Location is critical. And retail doesn’t substitute for eCommerce—margins, staffing, and real estate costs require disciplined operations.
Michael views location-based marketing and digital acquisition as complementary. For physical stores, local targeting through geofencing and services like Foursquare can drive awareness.
Adagio experimented with Foursquare ads and achieved a 360% ROI. The long dwell-time and solid average transaction reflect that once people are physically present, they value the experience.
For eCommerce, digital acquisition gives scale and reach beyond geography. But converting digital visitors requires higher trust, content, social proof, and low-risk entry—like those $2 samples.
“Local marketing brings people into immersive experiences; digital marketing scales reach,” Michael says. “Both feed into the same customer funnel.”
Scaling Infrastructure
As Adagio grew from a basement operation to serving over a million customers, infrastructure expansion became necessary. Today they have facilities in New Jersey, California, and the UK.
Michael outlined five reasons why they ultimately expanded their footprint:
- Geographic delivery delays. Shipping from just one coast produced poor transit times to distant customers. Regional fulfillment maintained service levels.
- Volume growth spikes and seasonal surges. They needed buffer capacity and multiple sites to manage risk and overflow.
- International markets. The UK facility allowed faster delivery in Europe and better handling of cross-border operations.
- Product line expansion. Adding teaware, tools, and heavier SKUs increased logistics demands.
- Redundancy/resilience. Multiple sites mitigated risks from natural disasters, port disruptions, and local constraints.
“Those inflection points were often driven by customer expectations, cost pressures, and the imperative to maintain quality and freshness even as scale increased,” Michael explains.
The Secret to Longevity
Adagio has survived and thrived for 25+ years while competitors like Teavana shut down. What’s the secret?
“Mission-led consistency,” Michael says. “We never lost sight of why we exist—delivering great tea, honoring the leaf, building trust.”
Other factors include relentless customer focus, balanced innovation and discipline, sustainable partnerships with farmers and suppliers, and treating brand as a long game rather than chasing short-term promotion.
The tea market has evolved dramatically since 1999:
Tea has shifted from commodity to craft/specialty. Consumers now care about origin, processing, micro-lots. Tea appreciation has become more experiential—tastings, subscriptions, ritual, education.
Digital acceleration means eCommerce, social media, and data-driven personalization are now standard. Tea tools and accessories have gained sophistication. And sustainability, transparency, and ethical sourcing have become table stakes in specialty tea.
“Over the years, the ones who survived (including us) are those who adapted—but without losing their foundational values,” Michael reflects.
That balance between adaptation and consistency is what separates businesses that last from those that flame out. Adagio adapted their business model from pure eCommerce to omnichannel retail. They innovated with products like ingenuiTEA and custom blending. They expanded infrastructure across three countries.
But they never lost sight of the core mission: delivering great tea, honoring the leaf, building trust with customers and farmers, and creating space for people to slow down and savor.
Twenty-five years after leaving investment banking to sell tea from a basement, Michael Cramer has built something rare: a profitable, sustainable family business that serves over a million customers while staying true to the values that inspired it in the first place.
You can explore Adagio’s full collection of loose-leaf teas, learn about the ingenuiTEA brewing system, or find their locations and products at Adagio.com.
Key Takeaways
First-year profitability was only possible because they stayed lean.
Operating from a basement with minimal overhead, cutting out middlemen through direct eCommerce sales, and having family alignment for fast decisions are all the kinds of advantages that let Adagio turn profitable immediately when most startups burn cash for years.
Financial skills alone are not enough to build a business.
Michael’s investment banking background provided discipline, financial rigor, and risk assessment skills. But he had to unlearn the speed and shortcuts of finance to embrace patience, craftsmanship, and agricultural cycles that tea demanded.
Direct farmer relationships require cultural humility.
INSEAD’s global emphasis prepared Michael for cross-cultural negotiation with tea farmers across Asia. Building partnerships based on respect and transparency, not transactional relationships, created sustainable supply chains that lasted decades.
Lower barriers to trial, maximize lifetime value.
The $2 sample program seems counterintuitive when everyone else maximizes average order value. But reducing friction for trial builds trust, reduces returns, enables exploration, and dramatically increases customer lifetime value and retention.
Innovation solves real pain points first, and educates second.
The ingenuiTEA teapot responded to “loose leaf is messy” customer frustration. But Adagio also educated customers on why better brewing matters, combining customer empathy with market education rather than just responding to stated needs.
Physical and digital retail are complementary.
Moving from pure eCommerce to retail partners to company-owned stores created omnichannel synergy. Local marketing (360% ROI on Foursquare ads) brings people into immersive 30-minute experiences; digital marketing scales reach. Both feed the same funnel.
Lasting a long time requires you to adapt while still staying true to your values.
Surviving 25+ years while Teavana shut down required adapting business models, innovating products, and expanding infrastructure. But Adagio never lost sight of core mission: delivering great tea, honoring the leaf, building trust. Adaptation with consistency beats rigid adherence or aimless pivoting.
The Mr. Mintz brand sounds like it should be about a dad who creates crafts with his kids. And in a way, it is—but the business brain behind it belongs to Lena Mintz.
Lena Mintz spent her career in corporate PR and advertising at companies like Mail.Ru Group, shaping stories for C-level executives. Then she had two babies back-to-back, the pandemic hit, and when it was time to return to corporate life in 2020, something didn’t feel right. She took an Etsy workshop almost by accident, started researching digital printables, and within months launched her first products.
Today, Mr. Mintz serves families and teachers worldwide across Etsy, Shopify, Teachers Pay Teachers, Made By Teachers, and TES Resources. The brand has 75,000+ Facebook followers and generates over 1 million monthly Pinterest views, all of which was done organically and without so much as a dollar of advertising. They offer hundreds of printable handprint crafts, finger puppet templates, and educational activities in multiple languages.
This is the story of how a former PR executive turned a $2.99 digital printable into a multi-platform family business—and why she describes it as building a “small spaceship” that’s solid enough to keep flying even when turbulence hits.

A Family Business With a Twist
“I’ve always been the one with the business background, and my husband has always spent more time with the kids than I did,” Lena explains. “Even when I was on maternity leave from my corporate job, I didn’t exactly pause my career. I started working on consulting projects—small startups, early-stage brands—things I could do from home, in my own rhythm.”
That flexibility became essential during the pandemic when everything was uncertain. Eventually, official maternity leave ended and Lena faced a decision: return to the 9-6 corporate life or build something of their own. They chose the second option.
“I had spent my whole career behind the scenes, doing PR for C-level executives and business leaders. Always shaping someone else’s story,” Lena says. “When we began dreaming up the brand, it made perfect sense to put the dad in the spotlight. It wasn’t just cute branding. It was true to life.”
The name Mr. Mintz came easily. It felt fun, trustworthy, and it sure didn’t hurt that it was their actual last name!
Lena creates and manages the stores, handles product development, SEO, and launch schedules. Her husband shoots and edits videos, tests crafts with the kids, and handles photography and social media visuals. Their kids are the ultimate product testers.
They’ve never worked with agencies, designers, or ad specialists. Everything has grown organically—Facebook (75K+), Pinterest (over 1M monthly views), YouTube (11K+)—all built from scratch with no ad budget.
The Accidental Entrepreneur
Lena didn’t plan to leave corporate PR. “But two things changed everything: I had two babies back-to-back, and then the world shut down.”
During maternity leave, she stayed partially active—helping startups with communications projects. But once leave officially ended, she faced a decision. She had meetings with the team she’d be rejoining. It didn’t click.
“The idea of spending my days away from the kids, away from this rhythm we had built, felt wrong,” she says. “And this was 2020—everything was uncertain. Lockdowns. School closures. No one knew what would happen next.”
Then, almost by accident, she came across a workshop on building an Etsy shop. She didn’t even know what she’d sell—she just felt a pull. She signed up, started researching, learned everything she could.
“It felt risky, but also incredibly energizing. I handed in my resignation, closed the door behind me, and gave myself full permission to try something new.”
Validating the Product & Finding the Handprint Niche
Lena’s “aha moment” wasn’t dramatic. It was methodical. She joined a seminar about dropshipping—not because she wanted that business model, but because she was searching for direction. The dropshipping model didn’t resonate, but the tools did.
“I started using eRank and other tools, just digging, exploring, narrowing down,” Lena says. “I wasn’t brainstorming ideas out of thin air—I was sifting through data.”
Then she came across the handprint niche. “I had no idea how strong the demand was until I saw the numbers. I thought, wait a second… this isn’t just a cute idea. This is a real, emotional product that parents are actively searching for.”
She focused on long-tail keywords, testing smaller sub-niches like custom versions, specific holidays, different languages. The first real sale came surprisingly quickly. One product turned into ten, then fifty.
The Multi-Platform Strategy, or “Building a Small Spaceship”
Mr. Mintz started on Etsy. “It’s uniquely beginner-friendly. You can open a shop, upload a few listings, and get your first sales surprisingly fast, even without a social media following or a budget.”
Shopify came next, growing slowly. “Unlike Etsy, there’s no built-in audience, no marketplace search. You have to drive the traffic yourself.” Now their traffic is consistent—split about 50/50 between Pinterest and organic Google search.
The decision to expand to Teachers Pay Teachers, Made By Teachers, and TES wasn’t about chasing revenue—it was about reducing risk.
“Etsy’s algorithm can be unpredictable. One month a product is your best seller, the next it’s buried—even if demand hasn’t changed,” Lena says. “So for me, it made more sense to reuse the assets we already had and upload them to multiple marketplaces. One platform dips, another might rise.”
Some people say she’s spreading herself too thin. But Lena chose this approach of diversifying channels deliberately.
“I like to think of it as building a small spaceship—not the fastest, maybe not the sleekest, but one that’s solid enough to get off the ground and keep flying, even when turbulence hits.”
Why The $2.99 Pricing Strategy Works
Digital printables seem simple to price because there’s no inventory and no shipping. But the reality is complex.
“The first layer is fees,” Lena explains. “Etsy takes a cut for just about everything—listing fees, transaction fees, payment processing. While 20 cents per listing doesn’t sound like much, it adds up quickly when you’re running hundreds of active listings.”
Pennies add up a lot when you’re selling a $2.99 product. It doesn’t leave much breathing room.
“The second layer is scale. These products are priced low, so success relies on volume. You need to sell a lot—and have a lot—to make meaningful income.”
Then there’s competition. Lena uses eRank to analyze what other creators charge. Some sellers price crafts at $1.00, but between fees and taxes, they’re walking away with pennies.
“It’s not sustainable, and frankly, it’s not really a business model—it’s more like sabotage.”
Pricing comes down to a balance between platform math and customer perception—finding that sweet spot where the product is attractive, affordable, and still worth the effort.
Protecting Intellectual Property
“In the niche I work in, it’s incredibly hard to create something so unique that it could be properly protected,” Lena admits. “Most printable crafts are simple, affordable, and easy to replicate with just a few tweaks.”
Legal protection is often not worth the effort. Even when you spot blatant copying, lawyer costs almost always exceed the product’s value.
“We’re currently in the process of trademarking our brand, Mr. Mintz, and that’s really the only thing we can protect for now.”
The rise of AI design tools made it trickier. “Before, you had to run ahead of your competitors. Now, you have to fly. But I’ve accepted that as part of the game. You can’t build a business by constantly looking over your shoulder. You just stay one step ahead—create better, create faster, and keep innovating.”
There are bright spots. On their own site, parents buying for multiple kids sometimes manually increase the quantity, allowing you to choose two or three licenses without being prompted.
“It’s rare, but it happens, and every time it does, I smile. It’s a reminder that people do value creative work.”
Another way they protect what they do is through customization. “We once got a message asking us to add a mustache to our firefighter craft. Another time, a customer asked us to replace a spotted cow with a brown one—because their dad is a farmer. They wanted the gift to feel truly personal. And we did it. That’s not something you can steal with a screenshot.”
Listening to TikTok and Teachers
Mr. Mintz doesn’t create products based on gut feelings. They follow demand and trends.
“A couple of years ago, when we were building our Father’s Day collection, we had an amazing flow of feedback from TikTok,” Lena recalls. “We’d post a new craft idea—like a handprint for a firefighter dad—and people would immediately comment: ‘What about a musician?’ ‘Can you make one for a doctor?’ ‘My dad works in IT—can you make one for that?'”
So they did. Several of their most popular templates were born from real back-and-forth with real parents.
They also use data, including tools like eRank to see what people are searching for. But the most meaningful ideas come from conversations. “Our audience builds this catalog with us—they’re not just buyers, they’re collaborators.”
One unexpected success was their Sukkot craft. Lena saw a question in a community group about decorating a sukkah and quickly created two handprint crafts, one with Hebrew text. Posted just two weeks before the holiday, they started selling immediately across all platforms.
“For something I designed myself in a single evening, that kind of response felt like a quiet win. Sometimes, being small means being quick—and that’s a competitive advantage.”

The Multilingual Expansion
Mr. Mintz offers products in Spanish, Hebrew, Arabic, German, and Indian themes.
“I lived in Israel for a few years, so when I started Mr. Mintz, it felt natural to include Jewish holidays and symbols,” Lena explains. Living in Spain now, she sees how important bilingual resources are, especially in the U.S. where many families have Hispanic roots.
Sometimes ideas come from customers. The German versions were born because a customer messaged: “We love your products—but it’s frustrating that we can’t use them in German.” So they worked with a native speaker to adapt the designs.
“Multilingual crafts help children connect with their heritage—or learn about others. And that’s something we deeply care about: making every child feel seen, no matter what language they speak or what traditions they celebrate at home.”
Final Thoughts On A Spaceship Still Being Built
Like so many creative companies, Mr. Mintz has more ideas than time. They’re exploring ways to launch a subscription with exclusive printables. TikTok is untapped. The Pinterest audience is there, they just need to catch up. The question is: what should happen next?
The website was restructured this summer to be more Google-friendly. Step two is preparing for AI-driven discovery, which means rethinking content structure and how their work surfaces in AI tools.
“It’s a whole new frontier, and I believe that’s where the next big wave of growth will come from.”
Her advice for aspiring digital product creators: “You don’t need ten products, or a big launch, or even a perfect idea. You just need something that feels right to you and the courage to publish it. Sometimes you think it’s a great idea, and it flops. Sometimes you post something simple—and it takes off. You can’t know until you try.”
She emphasizes that you don’t have to quit your job or hire experts. “Any business—especially digital—can start as a side project. The barriers are low, the startup costs are tiny. No storage, no shipping labels, no returns—just creativity and curiosity.”
You can explore Mr. Mintz at mr-mintz.com, browse their Etsy store, or find them on Teachers Pay Teachers.
Key Takeaways
Did you read this piece looking for tips on how to grow your own business? Here are some things that stood out to me.
Corporate skills transfer to entrepreneurship.
Lena’s PR background—shaping stories, understanding audiences, building brands—translated directly into creating Mr. Mintz. The skills that built other people’s brands became the foundation for her own.
Validation comes from data, not guessing alone.
Using eRank to research demand and competition, focusing on long-tail keywords, testing sub-niches is how Lena found the handprint niche. It was through methodical research that she got her first sale quickly.
Multi-platform presence reduces algorithm risk.
Relying on one platform is dangerous when algorithms can bury bestsellers overnight. Spreading across Etsy, Shopify, TPT, Made By Teachers, and TES creates resilience—when one platform dips, another rises.
Volume business requires pricing discipline.
At $2.99-$4.99, success depends on selling a lot. Platform fees eat into margins quickly. The math works only at scale, which is why maintaining hundreds of optimized listings becomes necessary.
IP protection is nearly impossible for simple designs.
Trademarking the brand name is feasible, but protecting individual craft designs is impractical. The defense is speed—create better and faster—plus customization that copycats won’t bother with.
Customer feedback beats trend forecasting.
TikTok comments asking for specific dad crafts led to bestsellers. The Sukkot craft designed in one evening from a Facebook group question sold immediately. Real conversations reveal demand that SEO tools miss.
Being small enables being quick.
Large companies can’t pivot as fast as a two-person kitchen table team. Designing and launching a craft in one evening, responding to customization requests, reacting to real-time feedback gives small companies the kind of agility that is a competitive advantage.
Winning the sale might feel like the finish line. But it’s just the start of the next race.
What happens in the minutes, hours, and days after someone clicks “buy” determines whether they become a loyal customer or quietly disappear. It shapes whether they leave glowing reviews or file returns. And it directly impacts whether your customer acquisition costs pay off in the long run.
Many eCommerce brands obsess over conversion rates, and that’s fine. But the post-purchase experience is where lasting customer relationships get built. Or where they fall apart.
To understand what works in post-purchase strategy, we talked with Brandon Thurgood, who leads marketing at Redo, a platform that helps eCommerce brands turn one-time buyers into repeat customers. Thurgood works with brands daily on post-purchase behavior, post-purchase emails, and the entire customer journey from order confirmation to review request.
We sent him 15 questions about the post-purchase experience. His answers cover everything from post-purchase dissonance to post-purchase surveys. Here, you’ll find loads of practical insights from someone who sees what works and what doesn’t across dozens of brands.
Here’s what you need to know.
1. What do customers usually do right after they buy?
The moment the transaction goes through, customers enter a specific mindset. They’re not relaxed. They’re anxious and actively looking for confirmation.
“A lot of times they’ll look at order confirmations and look for a timeline on when they’ll receive the product. Then it’s more of a waiting game for when the product will show up on the doorstep,” says Thurgood.
But, of course, the waiting game isn’t always passive. Customers are refreshing their inbox, hunting for shipping confirmations, and checking tracking numbers. They want proof their order is real and moving.
This first window in the post-purchase experience is critical. Leave customers guessing about whether their transaction went through and doubt creeps in immediately.
“Was my card charged? Did I enter the right address?” You don’t want these questions to have a chance to take root.
The fix is simple but essential: confirm the order immediately and set clear expectations for what happens next.
2. How do you stay in touch with customers after they purchase?
Post-purchase communication holds the entire experience together.
Thurgood describes the typical approach: “There’s a series of transactional emails sent via automations that highlight the order confirmation, when the product is shipped, when they should expect the package, when the package is delivered, asking for a review, etc.”
Customers are actively looking for information during this period. Many will search for tracking information or shipping status to resolve their “where’s my order” questions, Thurgood notes. There’s a decent amount of waiting for the product to arrive.
These emails serve one main purpose: answer the “where’s my order” question before customers have to ask. When done right, they keep buyers informed and confident about their purchase.
3. What makes customers regret their purchase decision?
Post-purchase dissonance—that nagging feeling that maybe you made the wrong choice—is real. And it’s driven by three main factors.
First, unmet expectations. Thurgood points to scenarios where customers receive the product and it doesn’t meet expectations: it doesn’t fit right, the material wasn’t the quality they expected, or they feel like they overpaid for a product.
Second, competitor advertising. As Thurgood explains, “Competitors most likely have ad campaigns running that are triggered based off their purchase so they’re seeing a lot of similar or competing products on social media during this time that they’ll likely compare to the product that they purchased.”
During the waiting period between purchase and delivery, customers are being actively retargeted by your competitors. That plants doubt.
Third, shipping and communication problems. Thurgood notes that shipping delays or poor communication from the brand can contribute to regret, especially if customers have to wait longer than expected or are unclear about when they’ll receive the package they were excited about.
None of these are completely preventable. But proactive communication can manage the doubt before it turns into a return request.
4. How quickly do buyers start doubting their choice?
Faster than you think.
“Almost immediately,” says Thurgood. “There’s a lot of anticipation built up during the shipping process that when the product arrives, it can be a make or break moment.”
But doubt doesn’t just appear at delivery. It starts earlier—sometimes before the package even ships. According to Thurgood, doubt can set in before the product even arrives if shipping takes longer than expected, gets delayed, or shows up damaged. In those cases, there’s an immediate letdown and lack of trust in the brand if there isn’t proactive communication around the delivery.
The other critical moment is first use. Doubt can emerge after the first use of the product if it doesn’t perform or feel the way customers expected when they purchased it, Thurgood explains.
This is why post-purchase behavior matters so much. The window between purchase and satisfaction is short, and it’s full of opportunities for doubt to creep in. Your communication strategy needs to address that reality head-on.
5. What causes customers to return items they just bought?
Returns are expensive. They eat margins, tie up inventory, and signal something went wrong. Understanding the root causes helps you prevent them.
Thurgood breaks down the most common return reasons:
- Fit or size issues, especially in apparel. The product doesn’t fit or feels different than imagined. Better sizing guides and accurate descriptions help here.
- Product doesn’t match description. Size, color, texture, or specifications differ from expectation. This is usually a product page problem—your content isn’t setting accurate expectations.
- Defects, damage, or quality issues. Items that are faulty, broken, or damaged in transit. Points to either manufacturing problems or inadequate packaging.
- Wrong item or variant shipped. A mismatch in what was ordered versus what was delivered. This is a fulfillment accuracy issue that erodes trust fast.
- Better alternative or buyer’s remorse. Customers change their mind or find a competitor’s version. Ties directly back to post-purchase dissonance. That is, they saw something better while waiting.
- Poor usability or product doesn’t work. The product fails to function or is hard to use. Often means product education was missing or insufficient.
- Shipping time too long. The item arrives after customers no longer need it, such as seasonal purchases. When delivery drags out, the original need might have already passed.
Each of these return triggers points to a specific fix. That might be better content, better fulfillment accuracy, better packaging, or better communication.
6. When should you send your first email after a purchase?
“Immediately,” Thurgood says. “Confirmation/thank-you should be sent immediately. This helps customers know that the transaction was successful and they have purchased the product.”
That instant confirmation email does more than just recap the order. It provides psychological reassurance that the transaction worked and the customer didn’t just throw money into the void.
After that initial confirmation, the rest of the sequence should be triggered by your fulfillment process. As Thurgood explains, “you should have a series of transactional emails triggered based on your fulfillment process to actively update customers on their shipping, [helping] them feel confident and informed about the delivery of their product.”
7. What should post-purchase emails actually say?
Post-purchase emails need to balance information with promotion. Get the balance wrong and you either leave customers confused or annoy them with sales pitches while they’re waiting for their order.
Thurgood’s framework for what to include:
First, the essentials: “include when customers should expect their order, confirm what products were included in the order for confidence, and give a link to the tracking page that they can go to for tracking updates on-demand.”
After the transactional basics are covered, you can layer in additional content. Thurgood notes that you can “confirm the order, include additional and relevant product recommendations for a new purchase, include promotional content and incentivize a repeat purchase with a special deal. After the order is delivered, you should request a review on the product as well.”
The key is sequencing. Lead with information customers need. That is: order details, shipping timeline, tracking link. Save the promotional content for after delivery or at least after the item has shipped.
8. How many follow-up emails are too many?
There’s a difference between transactional emails and promotional emails. Customers tolerate—and actually want—more of the former than the latter.
Thurgood’s advice: “lean towards overcommunicating on transactional emails about the order but limit the quantity of promotional emails that are sent pre-delivery of the order.”
For transactional updates about shipping and delivery, more is better. Customers want to know what’s happening with their order.
For promotional content? Less is more. Typically two to four marketing emails after the transactional emails are completed is common, according to Thurgood.
The worst mistake is overwhelming customers with sales pitches while they’re still waiting for their first order to arrive. That signals you care more about the next sale than delivering on the current one.
9. Do customers want tips on using their purchase?
It depends on what you’re selling.
According to Thurgood, “if there is any education or best practices associated with the product, then quick communication after the order is delivered or right before delivery to prepare the customer for the arrival of the product is a great option.”
Timing matters here. Don’t send product education emails during the waiting period when customers just want tracking updates. Send them right before delivery to prepare customers, or right after delivery when they’re ready to use the product.
Format matters too. Thurgood recommends that these emails should “include the content needed in the email and have options for more in-depth trainings and videos if the end user needs more information.”
Give customers what they need immediately—quick tips, setup instructions, basic guidance. Then offer pathways to deeper resources like video tutorials or detailed guides for those who want more.
Don’t assume everyone wants the same level of detail. Some customers want to figure it out themselves. Others want comprehensive walkthroughs. Provide both options.
10. Should you ask for a review right away or wait?
Timing a review request is about balancing urgency with experience. Ask too early and customers haven’t used the product enough to have an informed opinion. Wait too long and the moment passes.
Thurgood’s recommendation: wait three to seven days after the delivery of the item before requesting a review. The reasoning is simple—give customers time to have used the product and had a good experience before pushing for a review.
Customers need time to unbox, use, and form an opinion. But not so much time that they forget about the purchase entirely.
11. What’s the best time to survey recent customers?
Post-purchase surveys and review requests follow similar timing logic.
Thurgood recommends the same time frame as the review request.
That three to seven day window after delivery gives customers enough experience to provide meaningful feedback without letting so much time pass that the purchase becomes a distant memory.
12. How long should a post-purchase survey be?
Thurgood’s guidance is clear: “the shorter the better while still collecting the information that you’re looking for.” His recommendation is to decide as an organization what the most impactful information you can gather from your customers is and cut out any fluff.
His recommendation for structure: a mix of scale questions and ratings is best with optional free form at the end.
Long surveys lower completion rates. Every additional question is another opportunity for customers to abandon the survey halfway through. Focus on the questions that will inform your most important decisions.
13. What one question tells you the most about customer satisfaction?
According to Thurgood, the classic NPS question is the most telling: “On a scale of 0–10, how likely are you to recommend [product/brand] to a friend or colleague?”
Net Promoter Score gets criticized sometimes for being overused, but there’s a reason it’s become standard. It captures overall sentiment and separates promoters from detractors in a way that’s easy to track over time.
The magic of NPS isn’t just the score itself—it’s what you do with it. Promoters (9-10) are candidates for case studies and referral programs. Passives (7-8) need a reason to become promoters. Detractors (0-6) require immediate follow-up to understand what went wrong.
14. Do customers actually fill out post-purchase surveys?
Yes, but don’t expect overwhelming response rates.
Thurgood says that you can expect results to typically fall “somewhere between 10 and 20% completion rate depending on the product and the loyalty to the brand. You can try and use multiple channels (email, on-site customer support chat, social media, etc) to try and increase response rate.”
15. How do you turn post-purchase feedback into action?
Collecting feedback is pointless if it just sits in a spreadsheet somewhere. The value is in what you do with it.
Thurgood emphasizes that “having a system in place for what to do with feedback is huge. The key is having a clear way to consolidate feedback, group the feedback into key buckets and then assign internal ownership on each bucket—product, operations, support, logistics, and so on—so there’s an owner based on the varied feedback received.”
That organizational structure matters. Product feedback goes to the product team. Shipping complaints go to operations or logistics. Customer service issues go to support. Without clear ownership, feedback just becomes noise.
Thurgood also emphasizes integration with product development. “A portion of the product roadmap should be dedicated to improving current products, and the feedback would inform this portion.”
The brands that win on post-purchase experience aren’t the ones collecting the most feedback. They’re the ones using it to get better.
Final Thoughts
The post-purchase experience is where customer acquisition costs get justified. You can spend heavily on ads and conversion optimization, but if the experience after checkout is weak, you’re just buying one-time transactions.
Post-purchase dissonance is real. Customers start doubting almost immediately. They’re anxious, actively looking for information, and being retargeted by your competitors during the entire waiting period.
Your job is to manage that doubt with clear communication, meet expectations with accurate product descriptions and reliable fulfillment, and build trust with proactive updates and thoughtful follow-up.
Send that first email immediately. Overcommunicate on transactional updates. Wait 3-7 days before asking for reviews. Keep surveys short and focused. Most importantly, actually use the feedback you collect to improve.
None of this is complicated. But it requires intention and systems. The brands that nail post-purchase strategy don’t wing it—they build repeatable processes that turn buyers into customers and customers into advocates.
Imagine taking over a 40-year-old furniture business in 2020.
Not 2019. Not 2021. Right in the middle of the worst retail disruption in modern history.
That’s exactly what Richie David did when he became president of Totally Home and Totally Kids Furniture.
When Richie started in his new role, the brick-and-mortar location was already closed. The business was operating online from an office. And as you might expect for a business operating during the pandemic, there were all kinds of supply chain problems. That included massive shipping delays, port congestion, factory shutdowns, raw material shortages, and costs that skyrocketed overnight.
But with enormous challenges came a slew of new opportunities.
“It was a time of uncertainty everywhere in the world,” Richie says. “Everyone was home and fortunately wanted to spend on their home. So while the business was good, the challenges were even bigger.”
Today, Totally Home Furniture operates entirely online, serving everyone from parents furnishing nurseries to Airbnb hosts outfitting vacation properties. They’ve built a business around personal shoppers, furniture expertise, and quality products. And they compete directly with giants like Wayfair and Amazon by offering something those platforms can’t: real human guidance from people who know furniture.
This is the story of how a family-owned furniture business with 40+ years of history navigated a complete digital transformation during the worst possible time—and came out stronger.
Inheriting a Mature Brand During a Pandemic
Katherine Howes founded Totally Kids Furniture over 40 years ago with a clear mission: bring safe, fun, age-appropriate furniture options to families.
Throughout her 30+ years of interior design experience, she’d realized there was a serious lack of children’s furniture options on the market. She made it her mission to offer the largest selection of kids furniture on the planet, from their first big bed to their college loft.
By 2020, “she was ready to retire and travel the world full-time,” Richie explains.
Even if you take the pandemic out of the question, the transition from being founder-led to new leadership could have been rocky, but Richie had a clear vision for how to honor the company’s legacy while bringing it into the modern digital age.
“The best way to honor the company’s legacy [was] to continue our personal shoppers, excellent customer service, and bringing high quality furniture at the best prices,” he says. And as part of that, he “wanted to get the business up to speed with the online world, with an updated website and reviews added.”
Richie brought over 22 years of experience in digital marketing to the role. That helped him to “understand what buyers are looking for, questions they have, and how to build that trust.” And it’s this background that would prove essential for what came next.
The retail portion of the business had already closed before Richie stepped in. They were just operating the online part of the business from the office.
In a twist that was surprising at the time, demand was actually strong. With the benefit of hindsight, it’s only too obvious why: people stuck at home wanted to improve their living spaces.
And it’s here that Richie saw an opportunity.
People needed furniture. They were shopping online more than ever. And Totally Home had 40 years of supplier relationships, product expertise, and customer trust to build on.
So the question became: how do we push people to our website?
Working With A Quirky Domain Name
One of the first things you notice about Totally Home Furniture is the domain name: thebeanbagstore.com. Not totallyhomefurniture.com or shoptotallykids.com.
This URL suggests they sell bean bags. But the reality is that they offer everything from triple bunk beds to retro dining sets to queen loft beds.
Managing three different domains—thebeanbagstore.com, shoptotallykids.com, and totallyhomefurniture.com—seems like it would directly contradict SEO best practices and create brand identity challenges as well. But Richie has a pragmatic approach to the situation.
“Thebeanbagstore.com is the original domain and many know us from that so we decided to keep it.”
And sure, it’s not the most intuitive brand architecture. But it’s grounded in practical business reality. They have brand equity in that original domain. There’s link juice and domain authority tied to that domain. Customers know them by it. Changing it would mean starting from scratch with SEO, losing traffic, and confusing longtime customers.
So instead of forcing a rebrand, they embraced the complexity. The three domains all redirect to thebeanbagstore.com, which now serves as the primary URL for a company that sells far more than bean bags.
Going Beyond Kids Furniture
The company still claims “the largest selection of kids furniture on the planet”—and they can back it up.
But of course, for a company that’s been around a while, it’s not a small task to expand from kids-only to “Totally Home”. Going from selling kids furniture alone to furniture for every life stage is, by definition, a form of brand dilution.
And, indeed, how do you sell cribs, retro kitchen sets, and adult bunk beds without losing your identity?
Richie’s answer is simple: “We stick with quality suppliers, so you can trust what you are buying online.”
Those relationships, built over four decades, are the foundation of everything. They’re not manufacturing furniture themselves. They’re curating it from trusted suppliers and offering it through a single, easy-to-navigate online store.
In short, their product offerings changed, but their basic selling proposition didn’t. They’re careful curators and quality is the through-line whether you’re buying a toddler bed or outfitting an entire vacation rental.
Breaking Into the Vacation Rental Market
One of the most interesting pivots Totally Home made was by breaking into the Airbnb and Vrbo markets. Vacation rental owners are now a significant customer segment—and it wasn’t by accident.
“We offer beds that work for these types of properties trying to maximize occupancy,” Richie explains.
Think about what vacation rental owners need. They’re not furnishing a single-family home where one kid sleeps in each bedroom. They need to maximize sleep capacity to justify nightly rates.
For a lot of rental owners, that means adding bunk beds. But you can’t just put in any bunk beds an expect the five-star reviews to keep rolling in. They need specialty configurations that most mainstream furniture stores don’t carry.
Twin-over-queen. Queen-over-queen. Triple bunks. Queen loft beds with space underneath for a desk or seating area.
This is not what people seek out in their primary residences. But they are absolutely sensible if you need a configuration that sleeps 6-8 people in a 3-bedroom property.
The vacation rental market is enormous and growing. It reached $99.6 billion in 2023 and is projected to grow at 3.7% annually through 2032. Short-term rental platforms like Airbnb and Vrbo have fundamentally changed how people travel—and created a massive demand for furniture that works in those properties.
Vacation rental furniture also needs to be durable. It needs to withstand constant turnover and heavy use from guests who won’t treat it like their own. It needs to be easy to clean. And it needs to maximize space and sleep capacity to justify the investment.
Totally Home’s specialty bed configurations fit those needs perfectly. And their long-standing supplier relationships mean they can offer products you won’t find at Wayfair or on Amazon.
But specialty products are only half the equation. The other half is logistics.
The Logistics of Selling Furniture Online
There’s no way around it: the logistics of shipping furniture is a bear. There are the high shipping costs, complicated returns, assembly requirements, and the risk of damage in transit. These challenges get even more complicated when you’re shipping large items like bunk beds and dining sets across the country.
“We partner with furniture specific shippers that can offer white glove services,” Richie explains. “We work with several shipping companies to find the best option for shipping based on time and cost.”
White glove service means the carrier doesn’t just drop a box on the porch. They bring it inside, unpack it, assemble it, and remove all the packaging materials. For a vacation rental owner furnishing multiple properties, that service is invaluable.
What’s notable here is that Richie gives this part of the business the attention that it’s owed. Shipping quality furniture only to have it show up damaged is not going to be good for anyone involved—buyer or seller.
Competing With Giants
Let’s be honest: competing with Wayfair, Amazon, and big-box retailers sounds nearly impossible. They have massive marketing budgets, advanced logistics networks, and name recognition that a family-owned furniture store could never match.
So how does Totally Home compete?
“We offer personal shoppers,” Richie says. “Have a question you can get us on chat, email, phone and ask questions from our furniture experts that really know the products.”
This is the key differentiator. And it’s a smart one, too, because it’s utterly impossible to out-compete Amazon and Wayfair on price.
When you shop on Amazon or Wayfair, you’re browsing listings and reading reviews. When you shop with Totally Home, you can talk to a real person who knows furniture—not just SKU numbers and shipping times, but actual product knowledge about construction, materials, sizing, and whether a specific bed will work for your space.
That human expertise matters most for their diverse customer segments. Parents furnishing nurseries have questions about safety standards and which cribs convert to toddler beds. Vacation rental hosts need to know if a triple bunk will fit in a room with 8-foot ceilings. College students want to know if a loft bed will work in a tiny dorm room.
Personal shoppers can answer all of those questions in real-time, via phone, chat, or email. Giants like Amazon and Wayfair simply can’t offer that level of personalized service at scale.
But here’s the interesting part: Richie doesn’t try to market separately to each segment. “Quality products will sell themselves,” he says, “you just need to get them in front of the right audience.”
The strategy is to let product quality and customer reviews drive the business.
“We love reviews, want to know how customers use the furniture, how it’s standing up to everyday use and if they met their need,” Richie explains. “Then we use that to promote those products and ones from manufacturers like that since we know the quality is real.”
They use Shopper Approved to collect verified reviews from actual customers. The platform is an official Google Review partner and ensures authenticity—which means customers can count on the fact they’re not reading fake reviews or cherry-picked feedback.
It’s a feedback loop that keeps quality high and helps Totally Furniture make sure they are offering products that work for their customers—not just what looks good on a product page.
SEO for an Established Business
Richie’s 22 years of digital marketing experience have been essential to Totally Home’s success online. But even with that expertise, he’s learned hard lessons about what it takes to compete in furniture eCommerce.
The biggest “learning the hard way” moment? “SEO is an ongoing process, if you aren’t working the others will pass you up.”
It’s a lesson many eCommerce businesses learn too late. They invest in SEO once—optimize their product pages, write some content, build some links—and then assume they’re done. But SEO doesn’t work that way, especially in competitive categories like furniture.
Competitors are constantly improving their sites, adding content, earning links, and optimizing for new keywords. If you’re not actively working on SEO, you’re falling behind. In furniture, where customers do extensive research before buying and the sales cycle can take weeks or months, SEO is critical for being discovered at the right moment.
Making Changes without Breaking Anything
Richie understands the importance of making changes thoughtfully in an established business. When he took over from Katherine, he didn’t rush to overhaul everything.
“We make changes slowly,” he explains. “You don’t always understand why decisions were made so we try to not rush to change things. Let everything run as is and make changes only after you understand why the previous decision was made.”
That’s wisdom that only comes from experience. It’s tempting to look at a 40-year-old business and assume everything is outdated and needs to be modernized immediately.
But often there’s logic behind decisions that seems invisible at first. A supplier relationship that looks inefficient might be providing crucial backup inventory. A product category that seems random might serve a loyal customer segment.
By making changes slowly and understanding the “why” behind existing decisions, Richie avoided disrupting what was already working while still modernizing the parts that needed it—like the website, review systems, and digital marketing strategy.
Looking ahead, Richie has clear goals for expansion. “We want to do more dining sets and couches.”
It’s a logical next step. They’ve mastered specialty beds and kids furniture. They serve vacation rental owners who need complete furnishing solutions, not just beds. Expanding into dining sets and living room furniture positions them as a one-stop shop for entire homes and properties—not just bedrooms.
But true to form, they’ll approach that expansion thoughtfully, with an eye toward quality suppliers and customer feedback.
Final Thoughts
After more than two decades in digital marketing and several years leading Totally Home through its online transformation, Richie has strong opinions about what works in furniture eCommerce.
The challenge of building trust online is especially acute in furniture. People can’t touch the product, sit on it, or see the color in person. They’re spending hundreds or thousands of dollars based on photos, descriptions, and reviews. That’s a big leap of faith.
Richie’s advantage is understanding “what buyers are looking for, questions they have, and how to build that trust.”
His answer is threefold: personal shoppers who can answer questions in real-time, verified customer reviews that show how products perform in actual use, and transparency about suppliers and quality standards.
He combines this with his philosophy of making changes slowly in an established business as well. Counterintuitive though it may seem in a digital world that prizes “move fast and break things,” it’s a smart approach to stewarding a well-established business.
Slow and thoughtful beats reckless and fast.
After 40 years, Totally Home Furniture is still growing, still adapting, and still putting customer service and quality first. They’ve survived the transition from brick-and-mortar to eCommerce, weathered a pandemic that decimated retail, and found new markets like vacation rentals that didn’t exist when Katherine first opened the doors.
That’s not just survival. That’s evolution.
You can explore their full collection at thebeanbagstore.com or connect with them on Facebook.
Key Takeaways
Did you read this piece looking for tips on how to grow your own business? Here are some things that stood out to me.
Respect the past, but don’t be afraid to modernize.
Richie kept what worked—personal shoppers, quality focus, supplier relationships—while updating the website and review systems for the digital age. Respecting the past doesn’t mean being stuck in it.
SEO is never “done.”
If you’re not actively working on it, competitors will pass you up. It’s an ongoing process, not a one-time project. This is especially critical for high-consideration purchases like furniture where customers research extensively before buying.
Make changes slowly in an established business.
Understand why previous decisions were made before changing them. There’s often wisdom in what seems outdated at first glance. Let everything run as is and only make changes after you understand the logic behind existing systems.
Specialized expertise beats scale.
Personal shoppers who know furniture can compete with Amazon and Wayfair by offering something giants can’t replicate: real human guidance from experts who understand products, not just SKU numbers.
Find your niche within the niche.
Vacation rental owners need different furniture than families with young children. College students have different constraints than Airbnb hosts. Identify underserved segments and serve them exceptionally well rather than trying to be everything to everyone.
Customer feedback drives everything.
Reviews inform product selection, manufacturer partnerships, and what to promote. Listen to how customers actually use your products—not just what they say before buying, but how items perform in real-world use over time.
Partner strategically for operations.
White glove shipping services and relationships with multiple carriers solve the furniture eCommerce logistics challenge without having to build that entire infrastructure yourself. Find partners who specialize in your category and work with several to maintain flexibility on cost and speed.
Long-term supplier relationships are invaluable.
Forty years of supplier relationships gave Totally Home access to inventory, specialty products, and support that newer competitors couldn’t match—especially during supply chain disruptions. Those relationships are a competitive moat that takes decades to build.
Subscription boxes seem unstoppable now. But as recently as 2010, the business model barely existed. Rather, it was around 2011 when subscription boxes started to take off, with brands like BirchBox, Dollar Shave Club, and NatureBox becoming household names.
According to Market Research Future, the US subscription box industry was valued at $13.5 billion in 2022 and is expected to grow to $44.5 billion by 2032, which is more than triple!
Because subscription box businesses are so hot right now, a lot of people want to cash in. You might be one of them since you’re reading this article! So let’s talk about how you can start a subscription box business in 10 easy steps.
1. Understand the basics of subscription boxes.
As with any business, you need to thoroughly understand the market before you jump in. To help you do that, we’re going to go over the basics of the subscription box business model. This will help you determine whether it’s right for you.
What’s a Subscription Box?
Easyship said it best: “subscription boxes are recurring and physical deliveries of given products which are packaged with the aim of offering consumers additional value and a unique experience, added to the actual product contained within each box.”
Basically, subscription box buyers receive boxes full of unique and interesting products on a regular basis. Subscribers pay for a recurring subscription and receive boxes on a regular basis, usually every month. The boxes are full of physical items, many of which are surprises carefully curated to please the subscriber. Many subscription boxes show customers how much they saved on the retail value of the items contained within.
Last but not least, subscription boxes are almost always gorgeous. The packaging and the contents are often beautiful and made specifically for people to record unboxing videos.
Benefits of the Subscription Box Business Model
From a business perspective, there are a lot of benefits to the subscription box business model. But we wanted a first-hand perspective here, and for that, Ben Ajenoui, Marketing & Managing Director at the eCommerce platform, Opencart, was happy to oblige.
“Our move into subscription box services was driven by the growing demand for recurring revenue models in the retail space,” says Ajenoui. “Many of our users were asking for more streamlined ways to offer subscription-based products, and we saw an opportunity to support them.”
It’s no surprise that Opencart transitioned into the subscription box space when you consider the value of recurring revenue. The following five facts, taken together, make a really strong case for starting a subscription box business:
- Since boxes are sold on a subscription basis, revenue is much more predictable than with most kinds of eCommerce.
- Because subscriptions are recurring transactions, the average customer has a much higher lifetime value than other businesses.
- It’s harder to win a subscriber than it is to win a buyer, but once you do, the odds of retention are much higher.
- Subscription boxes are all about the unique experience, which gives companies great opportunities for branding.
- Because subscription boxes are sent out around the same time of the month in large batches, this simplifies shipping and fulfillment.
Disadvantages of the Subscription Box Business Model
Of course, the subscription box model isn’t perfect. We can think of five negative considerations that you need to weigh in as well.
- According to Pitchbook, the amount of venture capital going into subscription box startups has gone down in the last few years. This could be a sign that the subscription box boom is over. Alternatively, it could be a consequence of massively overhyped companies like Blue Apron going downhill, but not an indicator that the industry at large is failing. Make of it what you will.
- To prepare subscription boxes to send, you need a lot of upfront capital to begin with.
- Subscription boxes live and die on their ability to seem luxurious and unique. That means you need a strong understanding of the fundamentals of marketing and branding to succeed.
- Because subscription boxes have become so popular, there is a lot of competition.
- Much of the magic of subscription boxes stems from the novelty of the items in them. That means when the novelty wears off, so does the perceived value of the subscription box.
There are also some operational challenges to consider as well. Among them, Ajenoui lists “recurring billing, [setting up] flexible product options, and [implementing] advanced customer management tools.” Before getting into the subscription box business, it’s worth considering if your team has the operational chops to set all of this up.
2. Identify a real market need.
In order to build a successful business of any type, you need to identify real needs in the market and come up with a wait to meet them. Otherwise, people have no reason to want to buy from you at all!
This is especially true in the subscription box business model. The reason for this is because getting someone to sign up for a subscription is harder than getting them to sign up for a single purchase. That means your subscription box needs to be so compelling that it overcomes customers’ objections so that they do not hesitate to subscribe.
“Convenience, personalization, and the excitement of regular deliveries” rank high in terms of customer values, according to Ajenoui. As you work on the particulars of your subscription box model, it’s worth considering how these values intersect with the kind of products you sell.
3. Research your competition and find a unique niche.
Because the subscription box business is fairly crowded, you need to find a niche that stands out among similar subscriptions. Your customers have lots of different options, so you need to provide something popular in a way that no one else is. This is where market research is essential!
If you want to stand out among your competition, don’t try to create a new product entirely. It’s much easier to deliver better quality products than your competition than to completely forge your own path. One way that you can do this? Find good suppliers and form great relationships with them.
4. Figure out what to put in the subscription box.
At this point, you will want to figure out what your subscription box itself will be like. Subbly suggests considering the following factors:
- Pricing
- Number of items
- Type of products and their packaging
- Size of the box
- Design and aesthetic
- Engagement experience
- Written content and packing information
Naturally, this will be different for every industry and for each type of box. What you want to do here is figure out how to take several different items and figure out how you can tie them together and create a unique experience for the box opener.
5. Master the unboxing experience.
Much of the magic of subscription boxes comes from the feeling your subscribers will have when they are opening the box. There is a reason why many people take videos of themselves unboxing subscription boxes and post them online. There’s a reason people watch these videos, too – vicarious pleasure is a very real thing and it compels many new people to subscribe to your box!
So how do you actually do that? We have a few suggestions:
- Use custom packaging so that when your box arrives in the mail, people are immediately excited about it.
- Pack the boxes in such a way that not all items are seen at once. One way you can do this is by covering the contents with a thin sheet of cardboard and putting a small letter on top for people to read before opening the rest of the box.
- Make sure the individual items themselves are bright and colorful and that their packaging really stands out, making a feast for your subscribers’ eyes.
6. Set up the supply chain.
Understanding the supply chain is one of the key success factors for subscription box businesses. You need to make sure the boxes are a reasonable size and weight, so you need to have all that information from your item suppliers in order to proceed. Hopefully, you will also receive a discount on the items themselves so that you have a healthy profit margin. You may need to tweak the items in the box in order to get them to fit or to get the price to be reasonable.
It’s also smart to look into sourcing products from multiple regions. Nearshoring or dual-sourcing, which means sourcing products from two different countries, can help you avoid unexpected cost spikes if tariffs increase or trade disruptions occur.
Especially important to subscription box businesses is having good relationships with custom packaging providers such as Noissue or Arka. While custom packaging definitely costs more, remember that the experience is the selling point, not the items themselves which can all be purchased individually.
Lastly, you will want to work with a fulfillment company that you trust. Odds are, the items and packaging will arrive separately and in large quantities. While you can pack and ship your own items, companies like Fulfillrite can take care of that for you. In particular, preparing subscription boxes in advance would be considered a kitting project. As far as receiving the supplies themselves and then sending out the subscription boxes, both of those are very routine tasks that can be cost-efficiently handled by a fulfillment company on your behalf.
6.5. Watch out for increasing supply chain costs.
One more factor to plan for: rising supply chain costs. Tariffs on imported goods have increased unpredictably in recent years, and many subscription box companies are feeling the pinch.
“We’ve seen a noticeable uptick in landed product costs for our clients,” says Chris Rivera, CPA & Founder of The Ecommerce Accountants. “Especially those sourcing from China and Southeast Asia. Tariffs have compressed gross margins and forced many brands to rethink their sourcing and pricing strategies. This has been particularly disruptive for high-volume sellers in competitive niches where price sensitivity is high.”
“Tariff changes in 2025 have really pushed anyone shipping from China to rethink their numbers,” says Todd Stephenson, Co-Founder of Roof Quotes. “If you’re in that boat, it’s smart to talk with your suppliers and see if they can shift production to places like Vietnam or India. You can’t just sit back and hope things go back to normal, you have to plan like these tariffs are sticking around. That means adjusting your pricing and making sure your operations can handle higher costs.”
7. Start marketing your subscription box before launching the service.
Treat your subscription box service launch like you would any other product launch. You need to start marketing it long before you actually start shipping boxes. At a minimum, you need a good brand name, logo, and website. If you’re not sure where to start, you can always use Shopify.
Marketing for a service launch is more complicated than we can adequately discuss in a post like this, but we’ll give you a few tips here:
- Build your website with conversions in mind. Everything on your site needs to ultimately increase the odds that someone will subscribe to your service.
- Create a sense of urgency with special offers and landing pages. Getting new subscriptions is harder than retaining them!
- Remember the marketing funnel: first someone becomes aware you exist, then they become interested, they think about buying from you, then they ultimately choose to buy from you. Then after that, they choose whether or not to purchase from you again.
- Customize your boxes as much as possible.
- Build a mailing list.
- Start content marketing online, including guest blogging.
- Implement a referral program.
- Look into pay-per-click advertising on sites like Facebook, Instagram, and Pinterest.
If you want to research this subject in more depth, we stumbled across this fantastic guide that will show you how to market your subscription box!
When in doubt, consider the advice of Ajenoui. “The most effective strategy for acquiring subscribers has been offering a seamless, customizable experience.” Clearly, providing a good customer experience is not something that can be overlooked!
8. Figure out shipping and fulfillment.
We touched on this before, but it’s especially important. If you have 500 subscribers, that means someone will need to receive all your supplies and packaging, prepare the subscription boxes, apply postage, and then send them to your subscribers. You can do this yourself, but it makes a lot more sense to work with a fulfillment company since they specialize in handling large quantities of orders at once.
If you go through a fulfillment company, you don’t have to worry about assembling the boxes by hand. All you have to do is design the packaging, pick the items, and go find customers. Everything else can be taken care of for you, leaving you with a lot more time to find subscribers and make money!
9. Take feedback, make improvements, and retain customers.
As with any business, once you start shipping your first few subscription boxes, you will need to gather customer feedback. Customer retention is essential, so try to incorporate feedback as much as you can. Make improvements when they are recommended. In the long run, it will pay off!
When it comes to retention, Ajenoui advises offering “personalized engagement, exclusive offers, and flexible subscription management.” He later mentioned that “streamline your operations with a reliable platform is essential for scaling and long-term success.”
As you gather feedback, consider what questions you can ask to ensure that you are in line with Ajenoui’s thoughts on best practices.
10. Establish great customer service.
Customer retention is essential for a subscription-based model. That means that once you have started shipping boxes, you need to have excellent customer service in order to keep customers subscribed. Do anything and everything you can to keep customers happy. Be sure they can reach by phone, email, and – if you have the resources to adequately manage it – social media!
Final Thoughts
Subscription boxes provide customers with unique experiences and business owners with unique opportunities. If you can combine the ability to surprise and delight customers with pragmatic business expertise around matters like supply chain management, then this business model could work wonders for you. Just follow the tips above and you’ll be well on your way to success!
FAQ
How much money do I need to start a subscription box business?
Initial costs vary widely but expect $10,000-50,000 minimum. This covers inventory for your first few months, custom packaging, website development, marketing, and fulfillment setup. Factor in 3-6 months of operating expenses since subscriber growth takes time.
How do I price my subscription box?
A common rule is the 3x markup: if your product costs are $10, charge around $30. This covers packaging, shipping, customer acquisition, and profit margins. Research competitor pricing and survey potential customers to find the sweet spot between value perception and profitability.
What’s the biggest mistake new subscription box businesses make?
Underestimating customer acquisition costs and churn rates. Many founders assume subscribers will stick around longer than they actually do. The average subscription box has a 5-10% monthly churn rate, meaning you need continuous marketing investment to maintain growth.
Should I handle fulfillment myself or outsource?
Start in-house if you have fewer than 200 subscribers and adequate space. Beyond that, outsource to a 3PL experienced with subscription boxes. They understand the complexity of kitting multiple items and managing monthly shipping spikes.
How do I deal with seasonal demand fluctuations?
Plan inventory 3-4 months ahead and communicate with suppliers about expected volume changes. Consider seasonal product variations or limited-edition boxes to capitalize on peak periods. Some businesses offer gift subscriptions during holidays to boost revenue.
What if customers complain about receiving duplicate items from previous boxes?
Maintain detailed records of what each subscriber has received and implement systems to avoid repeats. Many successful subscription boxes create item pools for different subscriber tenure levels, ensuring longer-term customers get fresh variety.
Let’s say you have an amazing business idea–but you don’t have the money to get it off the ground. You’d hardly be alone here, since lack of funding is one of the most common challenges that startups run into. That’s why Kickstarter, and other crowdfunding tools are so attractive. Why raise funds from venture capitalists or bankers when you can ask individuals directly?
This is the concept behind Kickstarter, and crowdfunding in general. The appeal is undeniable. And that’s why Kickstarter has been able to help creators raise over $8 billion since its birth in 2009. It seems like everyone from famed author Brandon Sanderson to the creators of Pebble Watch and an unfathomable number of board game creators turn to the platform when it’s time to make money.
Kickstarter culture has become a complex and powerful beast over the last 15 years. So to help give you the context you need to succeed, we’re going to answer a few questions in separate sections. We’ll start by talking about what Kickstarter is, then we’ll discuss how you can use it in business and when it makes sense to do so. Then we’ll give you practical tips and additional resources toward the end.
What is Kickstarter?
Kickstarter is a crowdfunding platform that allows creators to fund their creative projects through the financial support of the crowd. The crowd here being a metaphorical one, dispersed around the world, made up of all kinds of people who are interested in the project.
Kickstarter was founded in 2009 and has since been the go-to venue for the funding of thousands of projects. Campaigns range from films and music to technology and design.
One of the calling cards of the Kickstarter business model is its all-or-nothing funding policy. Creators set a funding goal and a deadline, and they must meet or surpass this goal within the time frame to receive the funds. If the goal is not met, no money changes hands.
Can Kickstarter Be Used To Start A Business?
Absolutely, and in fact, there is a lot of precedent for that these days. Kickstarter is a very popular place for entrepreneurs to raise capital for their startup businesses. Kickstarter, as well as its peers like Indiegogo and Gamefound, allow individuals to present their business ideas to a wide audience. If the audience takes a shine to their offers, they can become backers, letting the entrepreneur secure funding through pre-sales or donations.
A classic example of this is the Pebble E-Paper Watch. It’s the first truly high-profile example of a business that started on Kickstarter. Their campaign in 2012 became the most funded in Kickstarter’s history at the time, raising over $10 million from nearly 70,000 backers. Kickstarter has only grown as a platform since.
Kickstarter has guidelines for starting a project which state that creators are responsible for completing their project and fulfilling each reward. Additionally, projects must fit into one of Kickstarter’s 13 categories, and they cannot fundraise for charity, offer financial incentives, or involve prohibited items.
Can Kickstarter Be Trusted?
Kickstarter has a strong reputation as one of the foremost crowdfunding platforms worldwide. To date, Kickstarter has been home to over 265,000 campaigns and has helped creators to raise almost $8.3 billion dollars since its inception in 2009.
Campaigners are also expected to be very transparent. For one, project funding progress is always publicly visible. Plus, creators are expected to share regular updates on project development and fulfillment of rewards.
As for protections and remedies for backers, Kickstarter ensures that creators are legally obligated to fulfill their promises. If a creator cannot fulfill a project, they must provide a refund or offer an explanation, detailing how funds were used, and the work done towards the project completion.
This does not mean that every single campaign ships and that every backer is pleased. However, given Kickstarter’s status as a platform for businesses to launch products in their early stages, it has been remarkably successful and reliable.
Kickstarter also has a dispute resolution process. It encourages backers and creators to communicate and work out issues amongst themselves. For egregious situations or policy violations, Kickstarter can intervene and take action such as suspending the project or banning the creator.
Why Use Kickstarter Instead of Regular Ecommerce?
To better answer this question, I’d like to share some insights from Darian Shimy, the Founder & CEO of FutureFund. His firm specializes in fundraising and volunteering for K-12 schools, so he has a lot of experience in the fundraising model that Kickstarter is based upon.
Shimy states that one of the primary reasons why you might use Kickstarter is to “assess the viability of a new product before fully developing or launching it. Crowdfunding allows entities to test concepts in a low-risk manner by generating interest and support for proposed products/services in a short campaign.”
The big idea here is that Kickstarter and other tools like it can be used for marketing research. Unlike eCommerce, you can see if there is interest in a product before spending a lot of money manufacturing it. And while eCommerce platforms such as Shopify and WooCommerce certainly have the ability to take preorders, they just aren’t quite as public as Kickstarter and its peers.
In short, Kickstarter can be used for market validation. For many business owners, this alone is worth the time and effort that goes into launching a campaign.
When Would You Choose Ecommerce Over Kickstarter?
Before you launch a Kickstarter campaign, it’s worth considering whether or not it is the best possible fit for your project. As Shimy states, “crowdfunding campaigns typically feature a few defined product reward tiers for a limited period.” In contrast, he states that “eCommerce provides constant browsability and purchasing opportunities.”
Put another way, one purpose of a crowdfunding campaign is to narrow the audience’s focus onto a single item with perhaps a few variants. If the goal is to start a business with multiple products right away, eCommerce is probably a better way to launch. Bear in mind that, should you successfully fund, you can always transition from Kickstarter to eCommerce after funding and fulfillment.
Tips for Starting a Business on Kickstarter
If you are thinking about starting a business on Kickstarter, here is a high-level overview of what you will need to do in order to launch your first project:
- Define Your Project: Detail what your project is, why it’s valuable, and how you plan to accomplish it. Be precise and thorough to create trust with potential backers.
- Set a Funding Goal: Analyze your budget carefully. Include production costs, shipping, taxes, and Kickstarter’s fees to set a realistic and achievable goal.
- Plan Your Rewards: Rewards should be enticing and offer value for money. Consider different tiers to cater to a range of backers. Include behind-the-scenes access or exclusive versions of your product for higher tiers.
- Create a Compelling Story: People connect with stories. Why are you passionate about this project? How will it benefit your backers? Use this narrative to engage your audience emotionally.
- Use High-Quality Media: High-quality photos and videos are crucial. They present a professional image and give potential backers a clear understanding of your project.
- Write Clear, Concise Copy: Keep your text easy to understand and get straight to the point. Use bullet points and headers to make your campaign easily skimmable.
In addition to creating a project, you will also need to promote it as well. Here are a few simple tips to help you with that:
- Use Social Media: Use platforms like TikTok, YouTube, Facebook, and Instagram to spread the word. Regular updates and engagement with your audience can boost your project’s visibility.
- Build a Pre-Launch Mailing List: A mailing list is a powerful tool for building hype before your campaign launch. Use lead magnets (like sneak peeks or discounts) to encourage sign-ups.
- Collaborate with Influencers: Partnering with influencers in your niche can get your project in front of a larger audience. Ensure the influencer’s audience aligns with your target market.
- Press Releases: Reach out to relevant media outlets and bloggers. A well-written press release can lead to valuable coverage and increased visibility.
Remember, successful crowdfunding requires careful planning, compelling storytelling, and active promotion. Kickstarter can provide a significant boost for your business, but your success on the platform will depend heavily on how much of an audience you are able to build on your own. Then once you have a community, you must proactively engage with your community and deliver on your promises.
Additional Resources For Launching a Kickstarter
Running a Kickstarter campaign is exciting, but difficult! Knowing where to start and what to do doesn’t come easy. That’s why we’ve put together this list of articles to help you run the crowdfunding campaign of your dreams.
If you’re looking for more general advice on how to run an eCommerce business, check out his series of articles instead.
And if you’re a bit further along and you’re worried about shipping and fulfillment, this set of articles will be perfect for you.
Good luck in your next business venture!
Thinking about launching a campaign?
Most successful Kickstarter creators figure out fulfillment before they launch, not after.
A quick form sent to our team will give you a realistic shipping cost estimate and a backer-count sanity check. No commitment unless you like what you see.
FAQ
What percentage of Kickstarter campaigns actually succeed?
Historically, about 39% of Kickstarter campaigns reach their funding goals. Success rates vary significantly by category—technology projects have lower success rates (around 20%) while games and design projects perform better (50-60%). Preparation and pre-launch audience building are key factors in success.
How much does it cost to run a Kickstarter campaign?
Kickstarter charges 5% of funds raised, plus payment processing fees of 3-5%. However, budget for additional costs like video production ($2,000-10,000), marketing, samples, and fulfillment planning. Many successful campaigns spend 10-20% of their goal on campaign creation and promotion.
Can I run multiple Kickstarter campaigns for the same business?
Yes, many businesses launch multiple campaigns for different products. However, Kickstarter requires each campaign to be for a distinct project. You can absolutely re-launch a project for the same product if your previous campaign didn’t fund successfully, but you must create a completely new project and submit it again for approval. Successful fulfillment of previous campaigns builds credibility for future ones.
What happens if I exceed my funding goal?
You keep all the money raised, minus Kickstarter’s fees. Many campaigns use stretch goals to add features or products when they exceed their target. However, be careful not to over-promise—additional funding often means additional complexity and costs.
How long should my Kickstarter campaign run?
Most successful campaigns run 30-45 days. Shorter campaigns (under 30 days) create urgency but may not allow enough time to build momentum. Longer campaigns (over 45 days) often see declining backer interest in the middle period.
What if I can’t fulfill my promises to backers?
You’re legally obligated to fulfill rewards or provide refunds. If you can’t complete the project, communicate transparently with backers about how funds were used and what work was completed. Kickstarter may intervene in cases of suspected fraud or gross negligence.
If you’ve never run a crowdfunding campaign before, you might be surprised at just how hard it can be. And that’s why many creators-to-be choose to work with crowdfunding marketing agencies.
Working with the right crowdfunding marketing agency can dramatically change the success odds of a campaign, turning one that might otherwise scrape by into one that shatters its funding goals. This is true whether you’re launching a tech gadget, publishing a tabletop game, or introducing a brand-new consumer product.
But beyond just making the choice to work with an agency, you need to choose the right one for you as well. This is another big deciding factor in whether your campaign succeeds or becomes another crowdfunding statistic.
To help you make an informed choice, we’ve compiled this list of eleven agencies. Each one was selected based on a proven track record, client success stories, quality service offerings, and deep expertise across major platforms like Kickstarter, Indiegogo, and equity crowdfunding sites. Each agency has its own strengths, but all of them have one thing in common: they know how to turn great ideas into great campaigns.
1. LaunchBoom
LaunchBoom isn’t just another marketing agency. They are the architects of modern crowdfunding strategy. Since their first launch in 2013 withEcoQube, they’ve built a crowdfunding empire that’s hard to ignore.
The numbers speak for themselves: 1,000+ products launched, $175M+ raised across Kickstarter, Indiegogo, BackerKit, and Gamefound. Reviews are consistently glowing as well, with 152 reviews on Trustpilot and 75 on Google, both averaging 4.6 out of 5 stars.
Their highlighted campaigns boast some staggering fundraising figures:
- Lomi (composting solution): $7,228,029
- The Crooked Moon (tabletop RPG): $4,020,234
- Kosmos (luxury stargazing): $1,918,337
- Give’r Frontier Mittens: $1,356,709
LaunchBoom pioneered the pre-launch reservation funnel, a system that’s now considered industry standard. Their approach is simple but effective: get people to put down small deposits (usually $1) before launch to reserve the best deal. Those depositors are 20-30 times more likely to buy than email subscribers alone because their purchasing intent has already been proven.
They’ve built proprietary software calledLaunchKit that handles everything from landing page creation to A/B testing to AI-powered copy generation. Plus, they’re both Kickstarter and Indiegogo certified experts with an official Kickstarter partnership through theirLearning Lab program.
They also wrote the bestselling book on crowdfunding,“Crowdfunded,” with 346 reviews and 4.7 stars on Amazon. It’s through this book that you can learn more about their funding philosophy and get a sense of what they would be like to work with as agency partners.
2. GrowthTurbine
This Canadian agency brings something unique to the table: deep expertise in equity crowdfunding. While most agencies focus on rewards-based campaigns, GrowthTurbine specializes in Reg CF, Reg D, and Reg A+ offerings alongside traditional crowdfunding.
Their full-scope approach covers branding, market validation, and post-investment strategy. If you’re looking to raise capital rather than just pre-sell products, GrowthTurbine knows how to manage the quirks and complexities of equity crowdfunding regulations, as well as investor relations.
They’re particularly strong with Wefunder partnerships and have built a reputation for versatility across real estate and traditional crowdfunding niches. For campaigns that need to balance compliance with marketing effectiveness, they’re one of the top crowdfunding marketing agencies to consider.
3. Jellop
When Kickstarter chose an official advertising partner, they picked Jellop. That partnership alone tells you everything you need to know about their capabilities.
With over $1.4 billion raised through their campaigns, Jellop operates at massive scale. Their pay-per-performance model means they only succeed when you do, and their proprietary analytics platform gives them insights that most agencies can only dream of.
Jellop’s exclusive relationship with Kickstarter is a huge asset. And it makes them one of the best Kickstarter marketing agencies available.They’re particularly well-regarded for their knowledge of Kickstarter’s algorithm, their ability to massively scale reach quickly, and for having direct access to Kickstarter’s team when campaigns need extra support.
If you’re launching on Kickstarter and want an agency with inside access, Jellop is hard to beat.
4. BackerCamp
Based in Barcelona but serving clients globally, BackerCamp has cracked the code on international crowdfunding. With over 5,000 clients across 30+ countries, they understand how to adapt campaigns for different markets and cultures.
Their performance-driven approach is based on their twin strengths in marketing strategy and creative content production. They’re particularly strong at creating video content that plays well with audiences across different regions, which is crucial for campaigns targeting global backers.
BackerCamp’s international strategies have helped countless campaigns succeed in markets they never thought possible. If your product has global appeal, they know how to unlock it.
5. Rainfactory
Oakland-based Rainfactory takes a full-stack approach to product launches. They don’t just handle crowdfunding—they integrate it with broader digital marketing strategies, including Shopify launches and Meta advertising.
Their strength lies in understanding how crowdfunding fits into your larger business strategy. They’re not just thinking about campaign success; they’re thinking about what happens after you’ve raised the money.
Rainfactory’s track record includes both high fundraising totals and fast product adoption rates. They understand that a successful campaign is just the beginning of building a sustainable business.
6. Brand Refinery
As the UK’s first crowdfunding consultancy, Brand Refinery brings deep experience and a methodical approach to campaign preparation. They’re masters of the pre-launch phase, focusing on readiness assessments, storytelling, and campaign tier structuring.
Their competitive analysis and strategic consultation services help campaigns avoid common pitfalls before they happen. Brand Refinery’s approach is thorough and systematic, making them an excellent choice for first-time campaigners who need guidance through every step of the process.
7. Samit Patel
Samit Patel offers flexibility that larger agencies can’t match. With done-for-you, done-with-you, and DIY options, they adapt to your budget and involvement level.
Their TLFES Strategic Planning System is tailored to individual campaign goals, and their coaching helps founders develop the skills they need for long-term success. If you want to learn while you launch, Samit Patel provides that educational component alongside campaign execution.
8. The LaunchPad Agency
With a 92% success rate, The LaunchPad Agency has refined their approach to a science. Their phased launch model combines PR, media outreach, and influencer marketing for maximum visibility.
They’re particularly strong at creating cinematic campaign videos that capture attention and drive pledges. With over 250 million video views across their campaigns, they understand how to create content that spreads.
9. Enventys Partners
Enventys Partners is the only agency on this list that handles both product development and marketing. From initial design through fulfillment, they offer true end-to-end services.
With over $100 million raised across more than 4,000 campaigns, they’ve seen it all. Their vertically integrated approach means fewer moving parts and better coordination between development and marketing teams.
If you have an idea but need help bringing it to market, Enventys Partners can handle everything under one roof.
10. Altosbiz
Altosbiz focuses on the human side of crowdfunding: community building and storytelling. Their hands-on approach to campaign visuals, copy, and PR creates campaigns that connect emotionally with backers.
They’re known for their transparent go/no-go assessments. Before taking on a client, they’ll honestly evaluate whether your product is ready for crowdfunding success. That honesty saves everyone time and money.
11. Crowdfunding Nerds
When it comes to tabletop and TTRPG campaigns, Crowdfunding Nerds is in a league of their own. Their team includes actual game designers and Kickstarter veterans who understand the gaming community from the inside.
With $30+ million raised through board game campaigns, they’ve built their reputation on deep industry knowledge. If you’re launching a game, you want people who speak the language and understand the audience.
Crowdfunding Marketing Agencies Compared: Key Features at a Glance
Making the right choice among the best crowdfunding marketing agencies will come down to your specific needs. Here’s a quick chart to help you narrow your options.
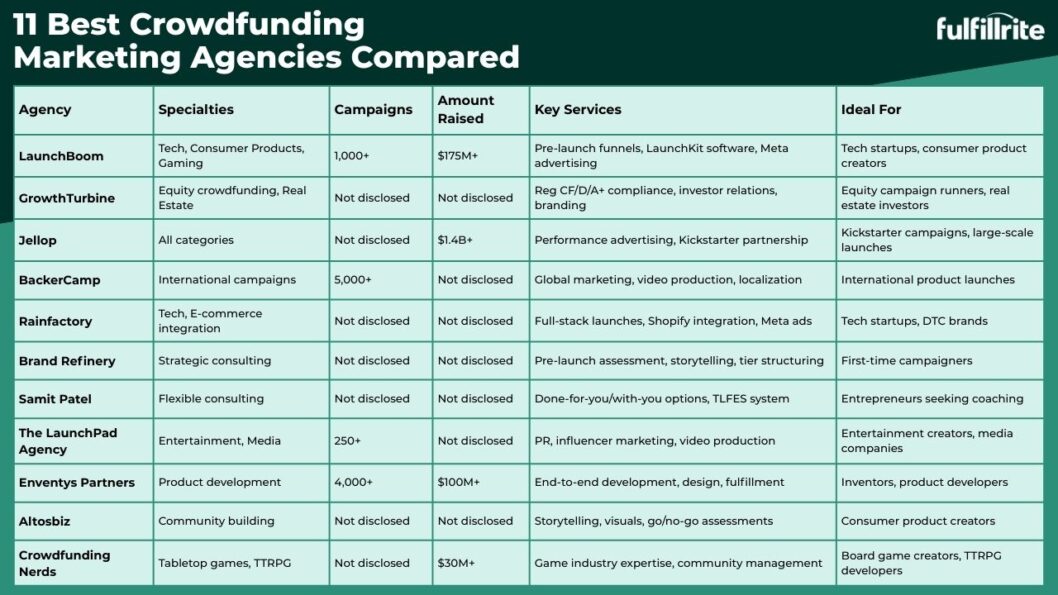
What to Look for in the Best Crowdfunding Marketing Companies
There are many more agencies than just the ones you see on this page. So it’s important, when doing your research, to know what to look for in potential partners.
Here’s what we believe separates the top-tier crowdfunding marketing companies from the rest:
- Industry Specialization: Generic marketing doesn’t work in crowdfunding because you need people passionate enough to back you months before receiving a product. So look for agencies that understand your specific industry, whether it’s tech, gaming, consumer products, or equity offerings. A board game expert won’t necessarily succeed with a tech gadget, and vice versa.
- Pre-Launch Expertise: The most critical phase of any campaign happens before launch. The best agencies focus heavily on building pre-launch momentum through email lists, reservation funnels, and community building. If an agency only talks about launch-day tactics, they’re missing the bigger picture.
- Platform Relationships: Agencies with official partnerships or certifications are well-positioned to understand platform algorithms and best practices. Jellop’s Kickstarter partnership and LaunchBoom’s certifications across multiple platforms, to give you some examples, show that they have insider knowledge that translates to better results.
- Transparency and Content: The best agencies share their knowledge freely. Look for agencies that publish case studies, create educational content, and openly discuss their methodologies. If they’re secretive about their process, that’s not a good sign.
- Proven Track Records: Anyone can claim to be a crowdfunding expert. Look for agencies with documented success stories, verified client testimonials, and specific campaign results. The best crowdfunding marketing agencies aren’t shy about sharing their wins.
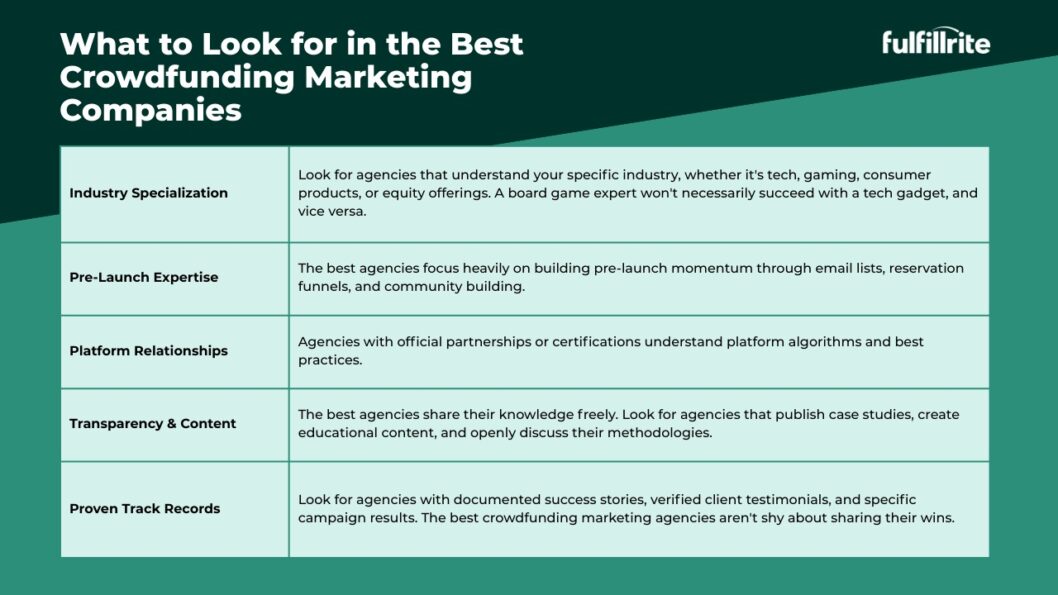
Why Partner with a Crowdfunding Agency?
Running a crowdfunding campaign yourself might seem cost-effective, but the reality is more complex. Professional agencies bring several advantages that often justify their fees:
- First-Day Momentum: Campaigns live or die based on their first 48 hours. Agencies know how to create the pre-launch buzz and day-one coordination needed to trigger platform algorithms and media attention. That early momentum often determines overall campaign success.
- Avoiding Common Pitfalls: Crowdfunding is full of hidden traps. Poorly structured reward tiers, inadequate shipping planning, compliance issues, and timing mistakes can kill campaigns. Experienced agencies have seen these problems before and know how to avoid them.
- Access to Networks: Top agencies have relationships with influencers, media contacts, and other promotional channels that take years to build. They can open doors that would remain closed to individual campaigners.
- Time and Expertise: Running a campaign is a full-time job that requires skills most entrepreneurs don’t have. While you focus on product development and business strategy, agencies handle the complex marketing and operational details.
The investment in a professional agency often pays for itself through higher funding totals and reduced post-campaign headaches.
Final Thoughts
The difference between a successful crowdfunding campaign and a failed one often comes down to execution. Great products fail every day because of poor marketing, while mediocre products succeed with expert promotion.
Choosing the right agency isn’t just about campaign success—it’s about setting your entire business up for long-term growth. The best crowdfunding marketing agencies don’t just help you raise money. They set you up for months and years to follow. And they do this by helping you build sustainable businesses that continue growing long after the campaign ends.
The agencies on this list have proven they can deliver results across different industries, platforms, and campaign types. Your job is to find the one that best fits your specific needs, budget, and goals.
Ready to launch your next big idea? Compare the best crowdfunding marketing agencies above and reach out to get expert help to take your campaign to the next level.
And if you need help shipping? Reach out today for a no-cost crowdfunding fulfillment quote.
Best Crowdfunding Marketing Agencies: Frequently Asked Questions
How Do I Choose the Right Crowdfunding Marketing Agency?
Start by reviewing case studies in your industry. A great track record with tech products doesn’t guarantee success with board games or consumer goods. Ask for specific examples of campaigns similar to yours.
Set clear budget expectations upfront. Agency fees typically range from $5,000 to $50,000+ depending on scope and services. Some work on retainer, others use performance-based pricing. Understand the model before committing.
Check platform certifications and partnerships. Agencies with official relationships understand platform algorithms and best practices better than those working from the outside.
Finally, ask for a custom proposal that outlines their specific strategy for your campaign. Generic approaches rarely work in crowdfunding.
What Is the Difference Between Crowdfunding Agencies and General Marketing Firms?
Crowdfunding agencies specialize in time-sensitive, community-driven campaigns that follow unique rules and best practices. They understand platform algorithms, backer psychology, and the importance of pre-launch momentum.
General marketing firms focus on ongoing campaigns and brand building. They’re great for long-term marketing but often lack the specific expertise needed for successful crowdfunding campaigns.
Crowdfunding requires especially keen skills when it comes to social proof generation, launch phase planning, PR coordination, and community management that general firms usually don’t have. The timing, messaging, and tactics are substantially different from traditional marketing.
What Platforms Do These Agencies Work With?
Most agencies specialize in rewards-based platforms like Kickstarter and Indiegogo, which represent the majority of crowdfunding campaigns. Some also work with newer platforms like BackerKit and Gamefound.
For equity crowdfunding, agencies typically work with Wefunder, SeedInvest, StartEngine, and other SEC-regulated platforms. These require different expertise due to legal compliance requirements.
Many agencies also integrate crowdfunding with direct-to-consumer strategies, helping transition successful campaigns to ongoing Shopify or Amazon sales.
How Much Does It Cost to Hire a Crowdfunding Marketing Agency?
Agency pricing is highly variable, and is influenced on factors including scope, services, and agency tier. Basic consulting might start around $5,000, while full-service campaign management can exceed $50,000.
Most agencies use one of three pricing models:
- Retainer: Monthly fees ranging from $3,000 to $15,000
- Project-based: Fixed fees for specific deliverables
- Performance-based: Percentage of funds raised (typically 5-15%)
The best among the crowdfunding marketing companies often combine models, charging a base retainer plus performance bonuses. This aligns their incentives with your success while ensuring they’re compensated for their work regardless of outcome.
How Long Before My Launch Should I Hire an Agency?
Hire an agency at least 3-4 months before your planned launch date. The best campaigns require extensive pre-launch preparation including audience building, content creation, influencer outreach, and PR planning.
Some of the most successful campaigns start building their audiences 6-12 months before launch. The earlier you start, the stronger your launch will be.
Last-minute agency hires rarely succeed because there’s insufficient time for proper preparation. Crowdfunding marketing agencies, when you compare them by success rate, consistently emphasize the importance of adequate lead time for campaign preparation.